
Help center > Scheduling > Online booking
Online booking
- Enabling client portal and online booking
- Customizing your client portal web address
- Availability preferences for online booking
- Appointment requests
- Cancelation policy
- Dynamic booking links
Enabling client portal and online booking
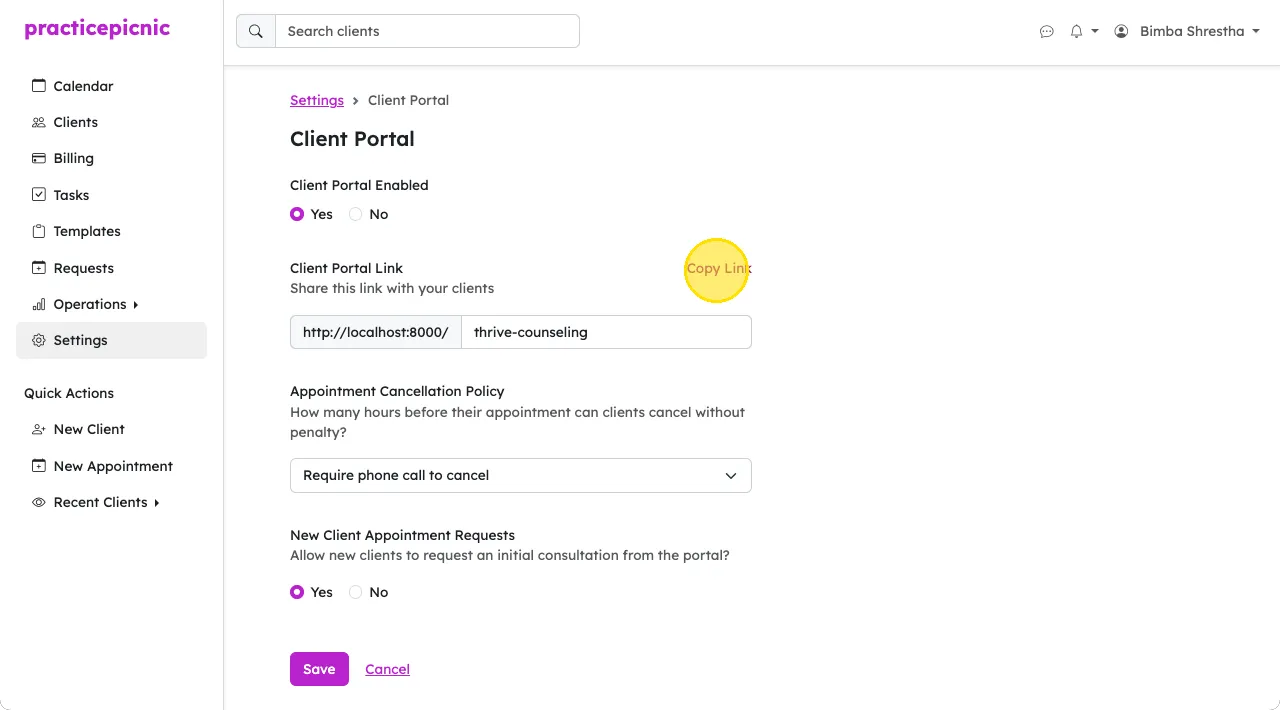
Clients request appointments from the client portal. It must be enabled for your practice by an Admin clinician or Practice manager from Settings > Client Portal.

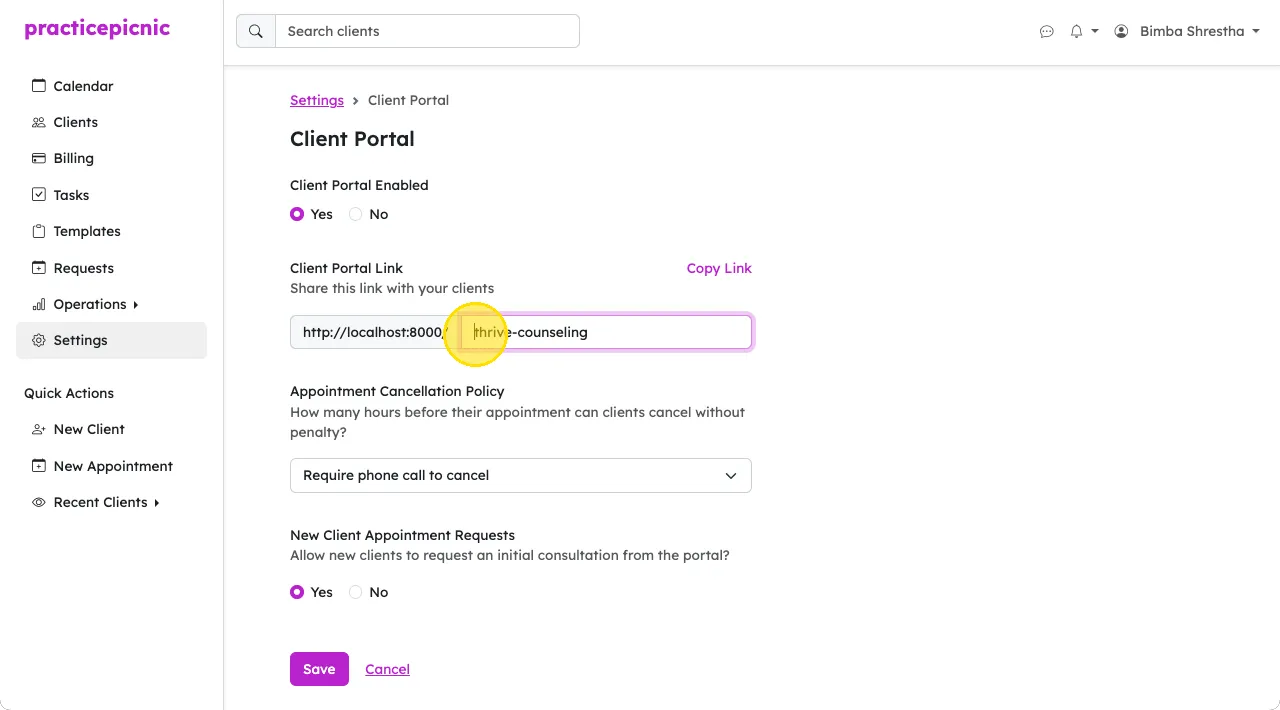
Once enabled, you can view your live client portal by clicking on the Copy Link button and pasting that link in a new browser tab. If you don't see or have access to the client portal page in your settings, ask one of your practice's Admin clinicians or Practice managers for the client portal link.
You can toggle whether you want new clients (who don't yet have a profile on Practicepicnic) to be able to request appointments or not.
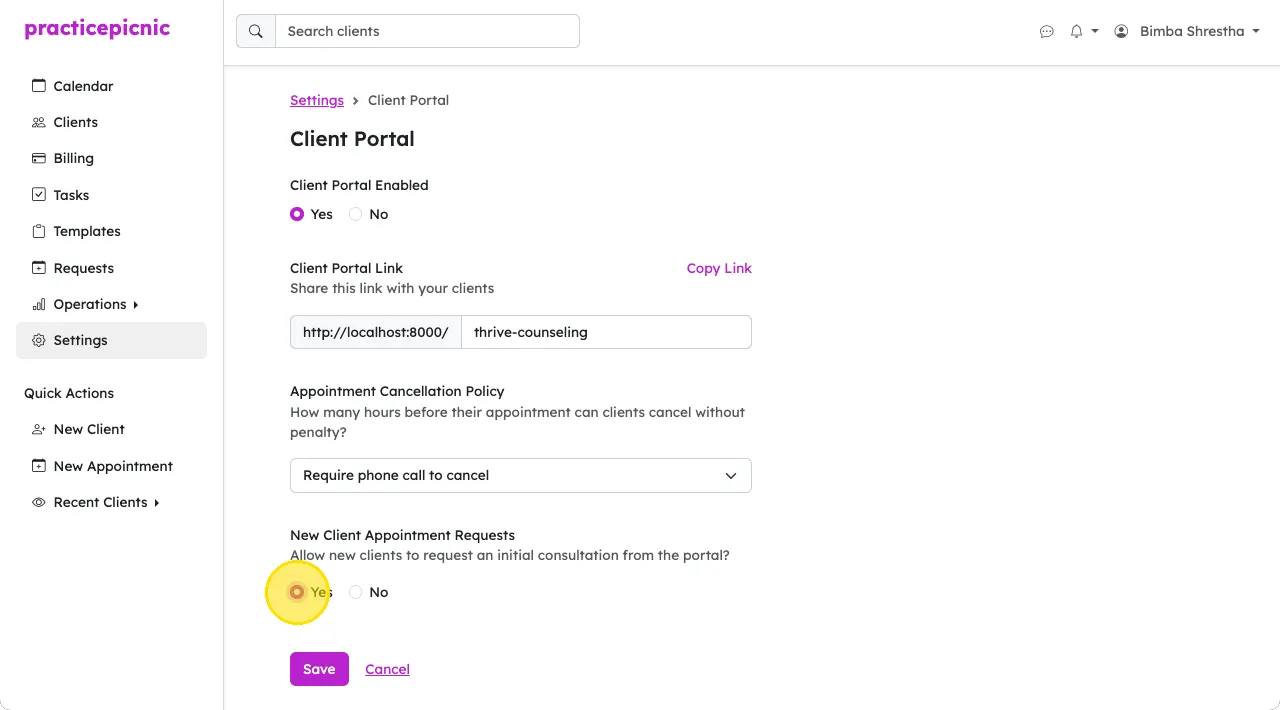
When enabled, your client portal will include a button where new clients can view clinician availability and request an appointment.
Customizing your client portal web address
If you're an Admin clinician or Practice manager, you can customize your practice's client portal web address from Settings > Client Portal.
Online booking preferences
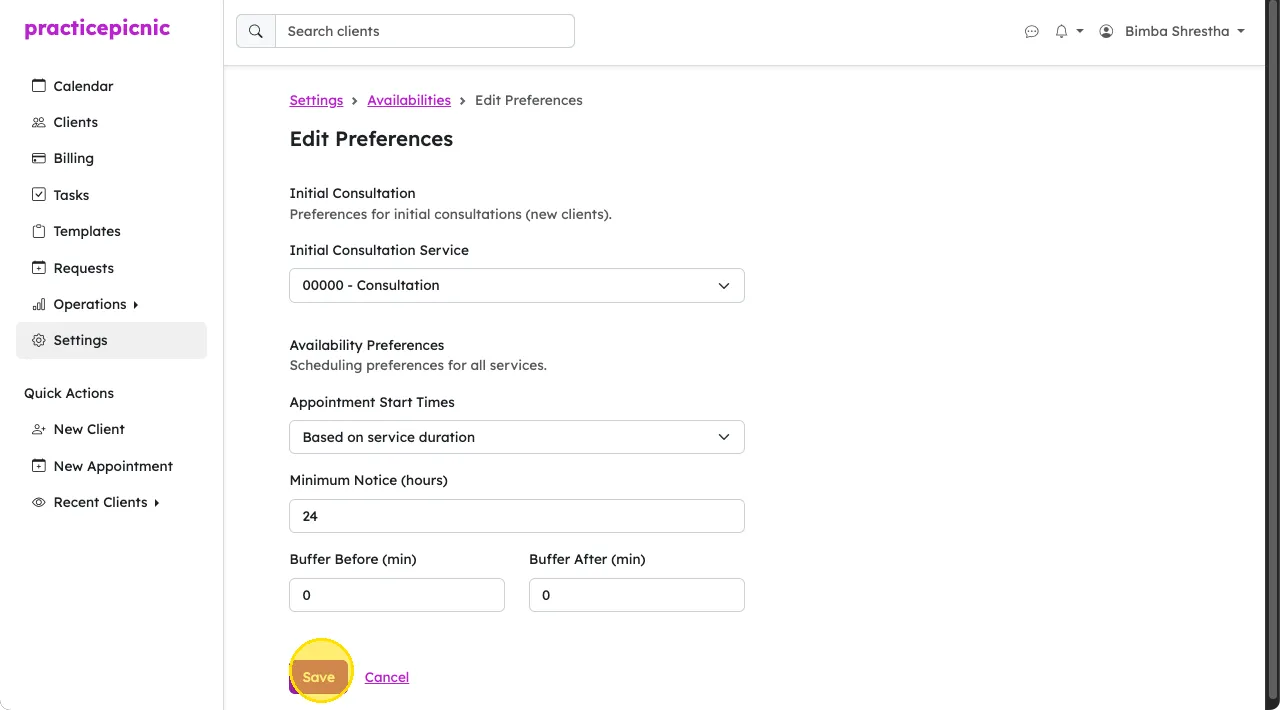
On the Settings > Availabilities page, you can customize certain online booking preferences. Click on the Preferences button to find these options.
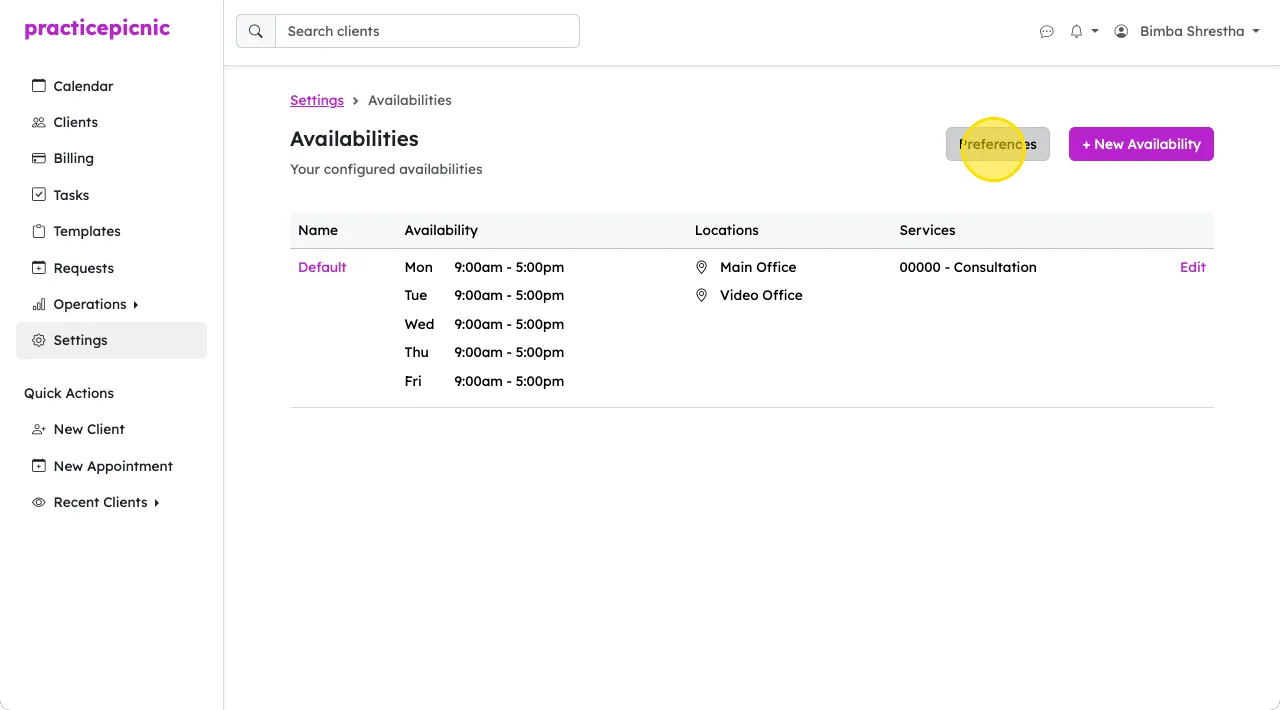
On this page, you can customize:
- Initial consultation service: The service that new clients (who don't yet have a Practicepicnic profile) can book from the client portal.
- Appointment start times: What interval appointment start times should be displayed at.
- Minimum notice: Number of hours notice you need for online bookings.
- Buffer before: Number of minutes to leave before appointments.
- Buffer after: Number of minutes to leave after appointments.
Appointment requests
From the client's perspective
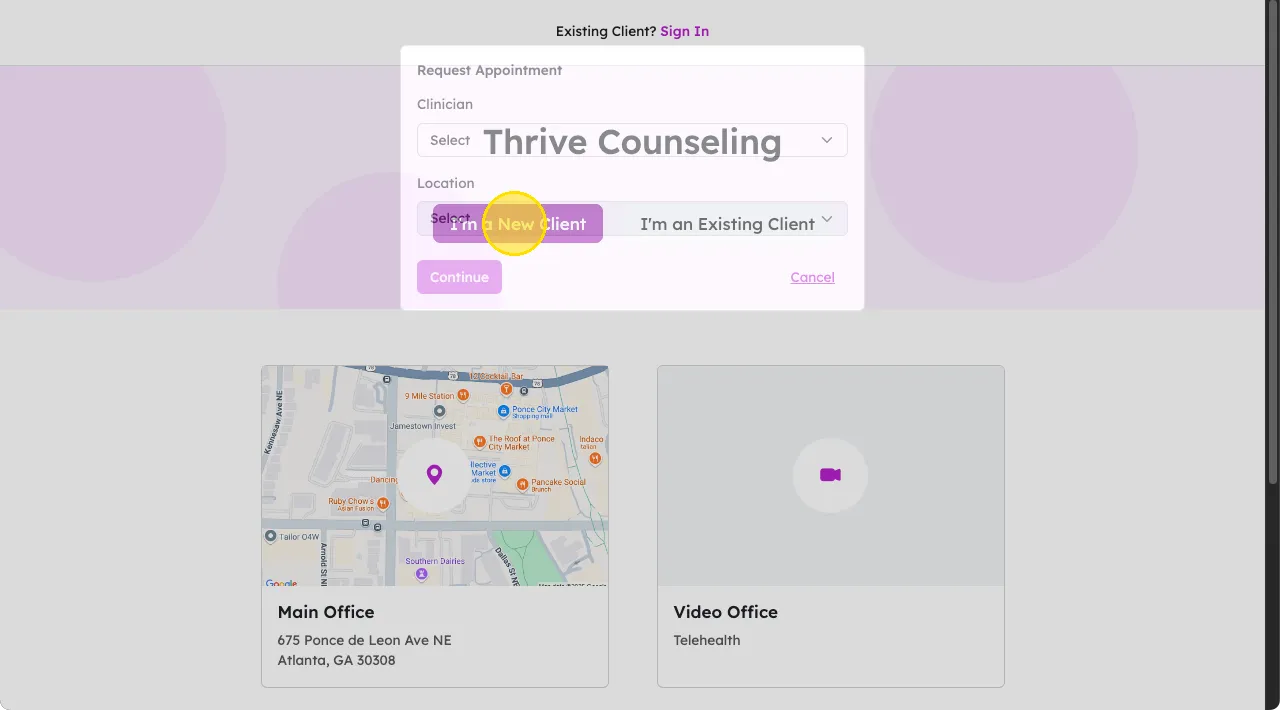
Both new clients and existing clients can request appointments from your client portal. New clients will click on the I'm a new client button from the client portal. They will then follow instructions to request a new appointment.
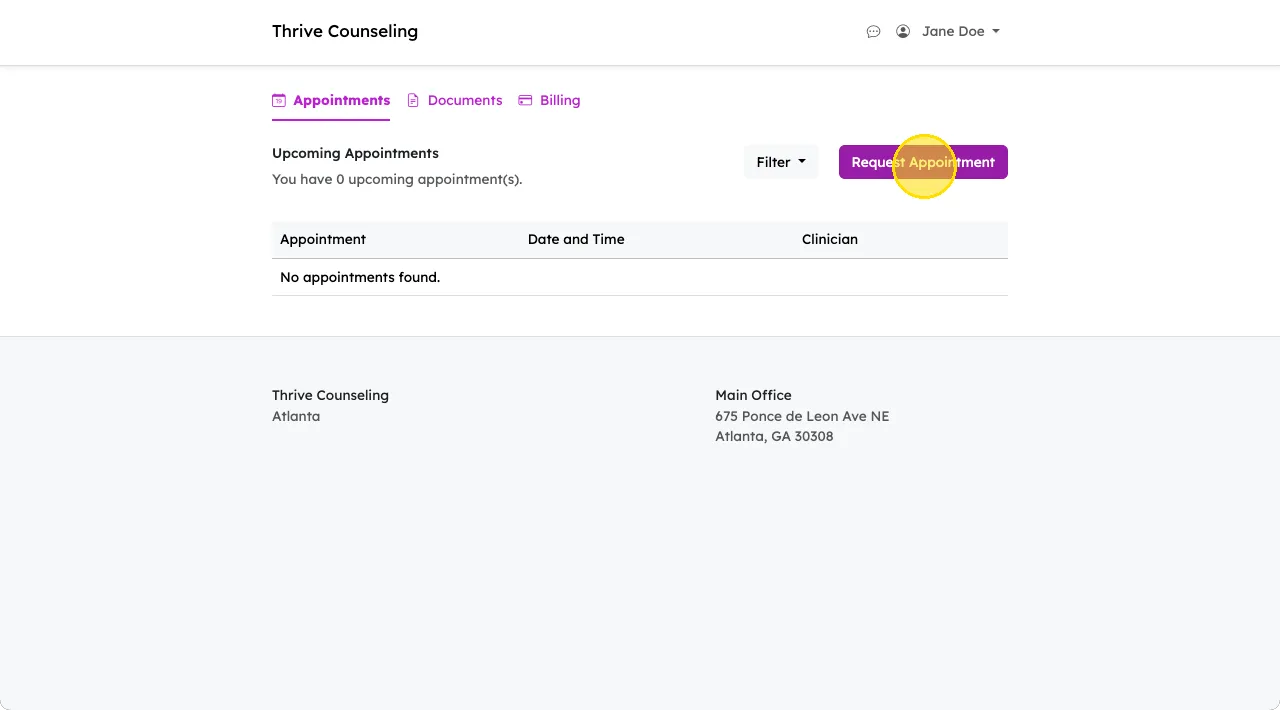
Existing clients will click on the I'm an existing client button.
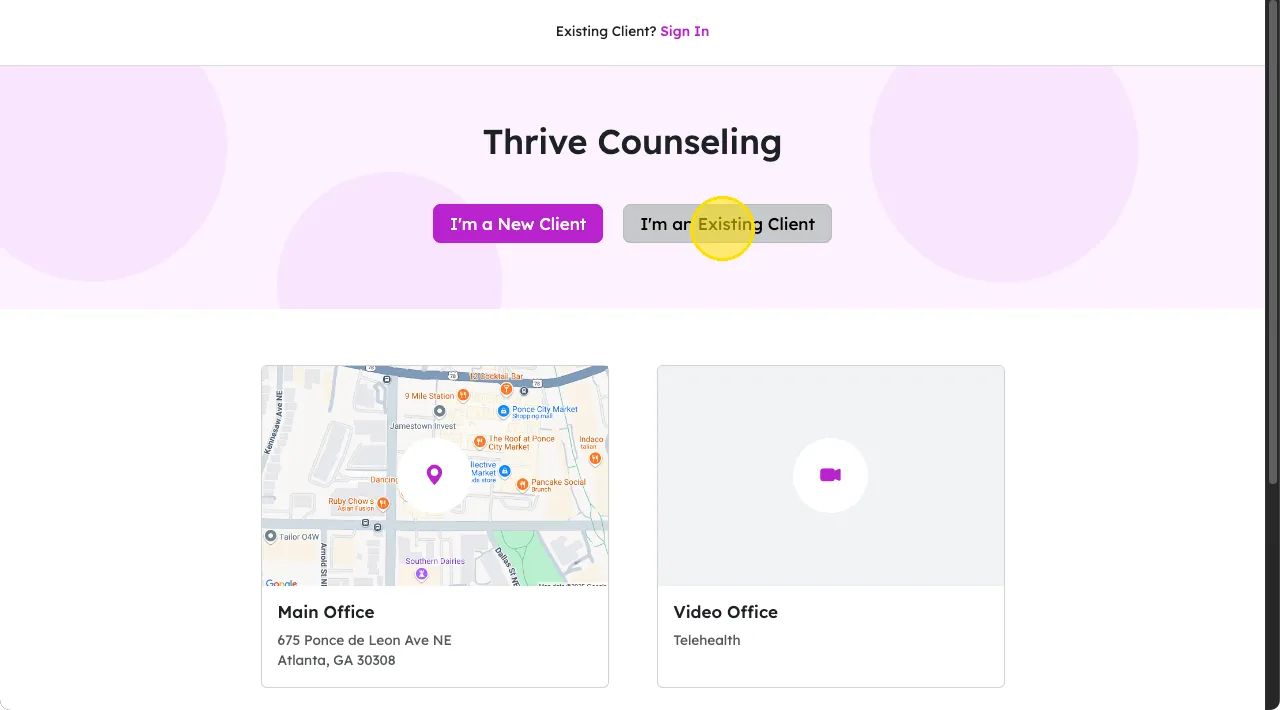
They will then sign in to their client portal and click the Request Appointment button. They will then follow instructions to request a new appointment.
From the clinician's perspective
Once a client makes an appointment request, the clinician will be notified via email and via the notifiation bell on the top right of the app. Appointment requests will show up under Appointment Requests.
Click Actions > Approve to approve the appointment request and add it to your calendar. Approving a new client's appointment request also creating a new client with the name, email and phone number that was provided while making the request.
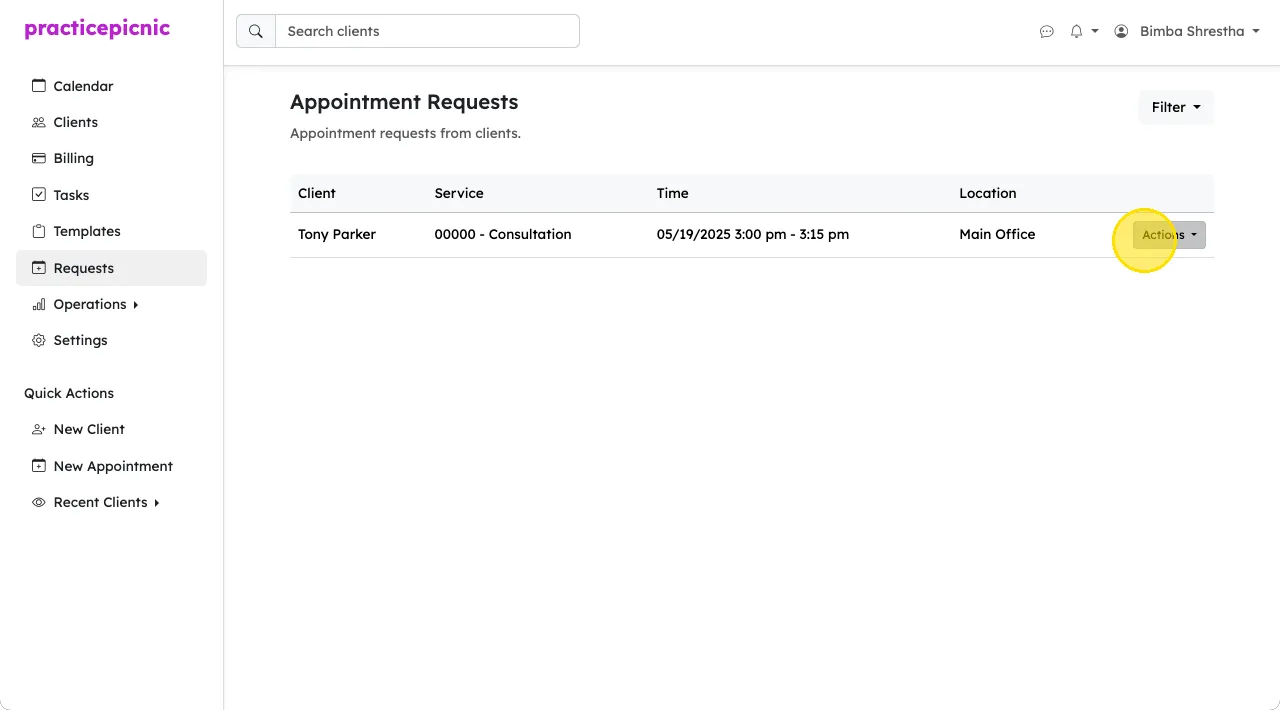
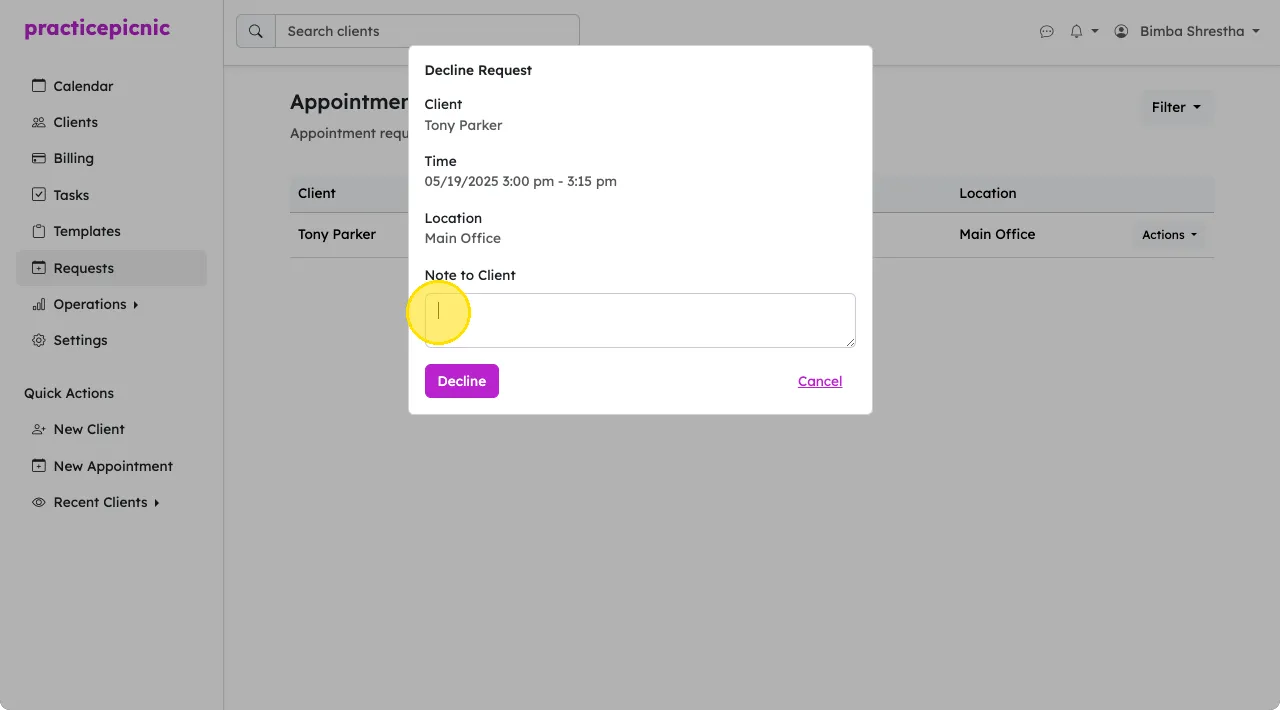
Click Actions > Decline to decline the appointment. When declining an appointment request, you'll also have the option to provide a note to the client. This note will be emailed to them.
Cancelation policy
Admin clinicians and practice managers can also control the practice's cancelation policy from Settings > Client Portal. Select the cancelation policy from the dropdown and click Save.
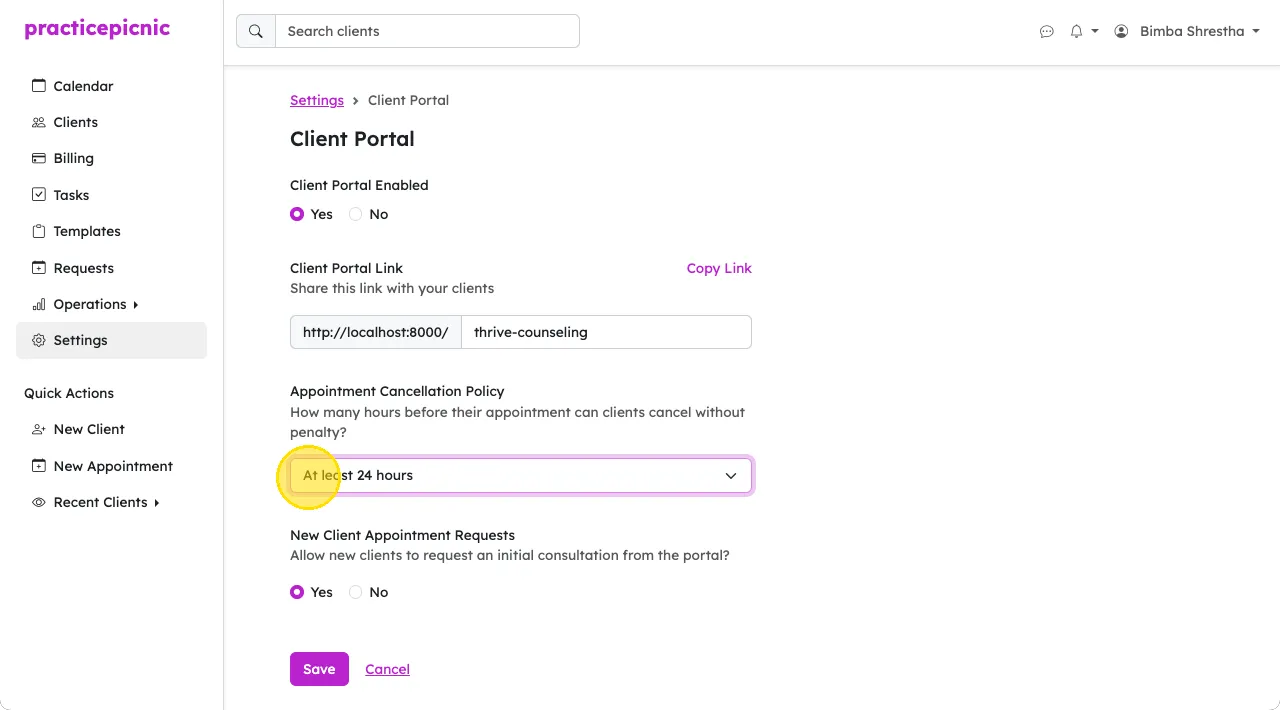
The policy options are:
- Require phone call to cancel
- At least 24 hours
- At least 48 hours
- At least 72 hours
If the first option is selected, clients will not be able to cancel from the client portal. They will have to contact their clinician directly.
For the other three options, clients will have the option to cancel from the client portal. Whether an appointment is marked Canceled or Late Canceled will depend on the cutoff selected. See Appointment actions for more info on these appointment statuses.
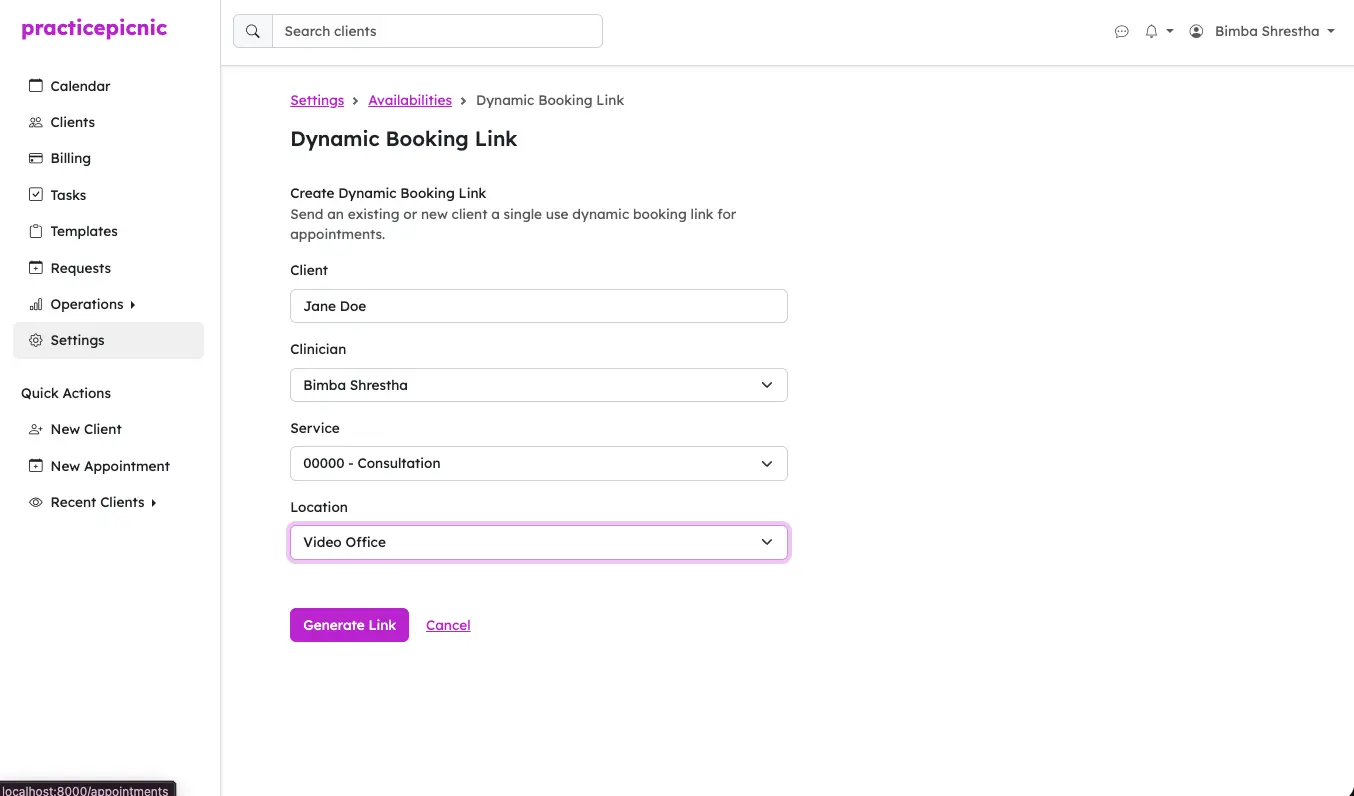
Dynamic booking links
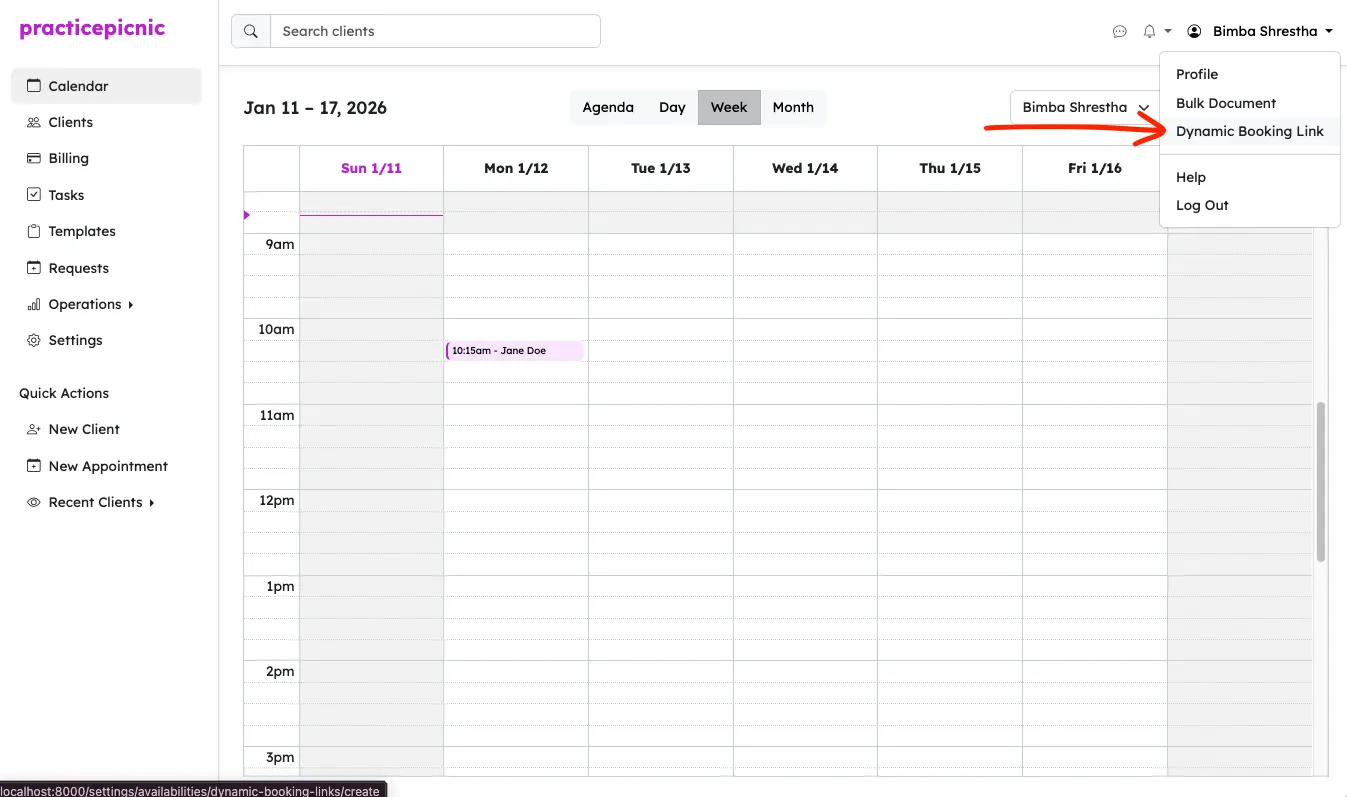
Users can send direct, single-use booking links to new or existing clients. This allows you to pre-fill information like clinician, location, service, and whether this is for an existing or new client.
From the profile dropdown, click on Dynamic Booking Link.
Specify the details that you want to pre-fill in the booking link.
- Client: new or existing client
- If you select an existing client, the booking link generated will be a direct link to that client's portal with service, location, and clinician info pre-filled.
- If you select New Client, the booking link generated will be a direct link to schedule an initial call for the specified clinician and location. Once you approve the new client's request, a client profile will be created.
- Clinician: who to book the appointment for
- Service: which service to book the appointment for
- Location: where to book the appointment
After specifying these details, click Generate Link.
Copy the generated link and share it with your client.
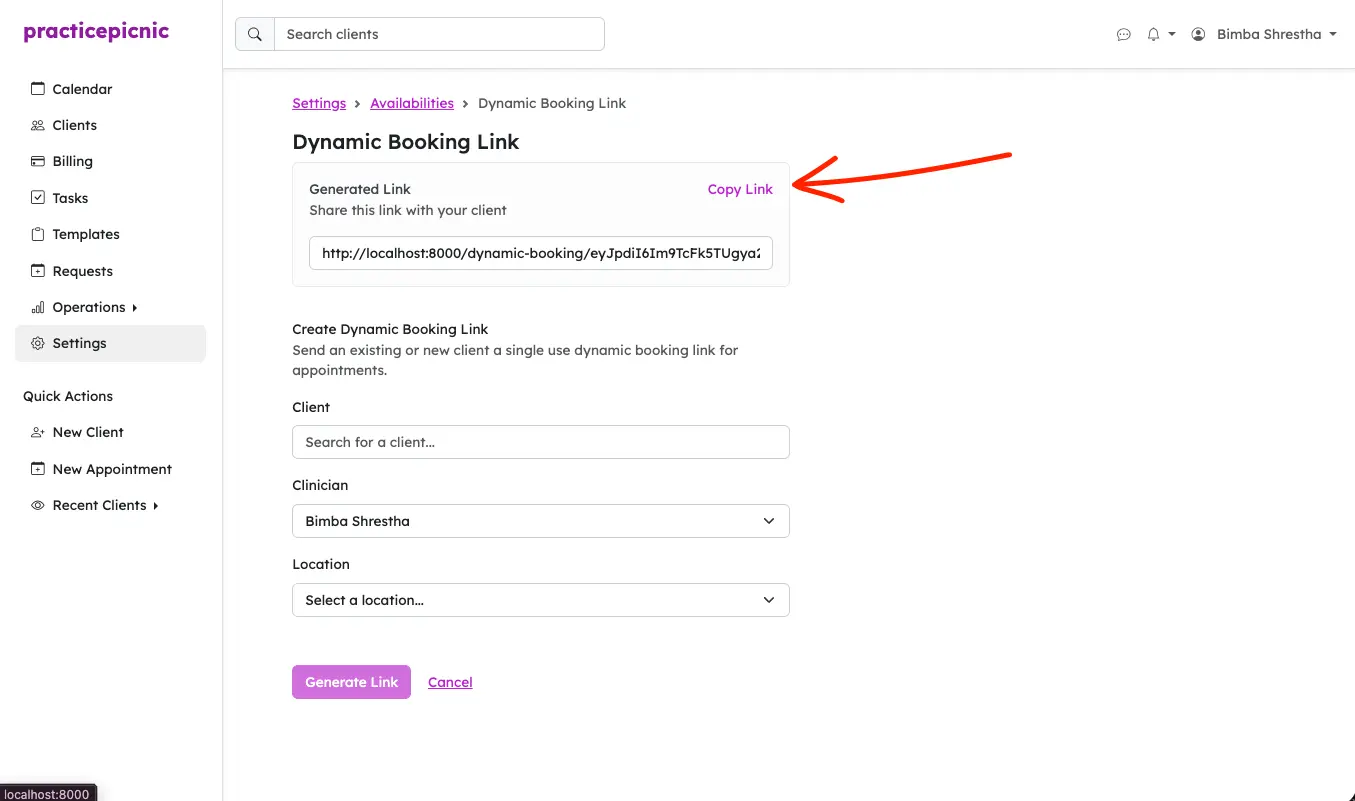
The client will then be able to request an appointment from this link. Here is an example of the screen they would be taken to after clicking the link.

Appointments will only be added to a clinician's calendar once they approve the appointment request from their account. They will not be automatically added to the clinician's calendar without approval. See Appointment requests for more details on this.