Help center > Documentation > Client documentation
Client documentation
- Creating a new document
- Signing a document
- Uploading a document
- Printing, exporting and sharing notes
- Session notes from AI
Creating a new document
You can create a new document in Practicepicnic from the client's Documents tab.
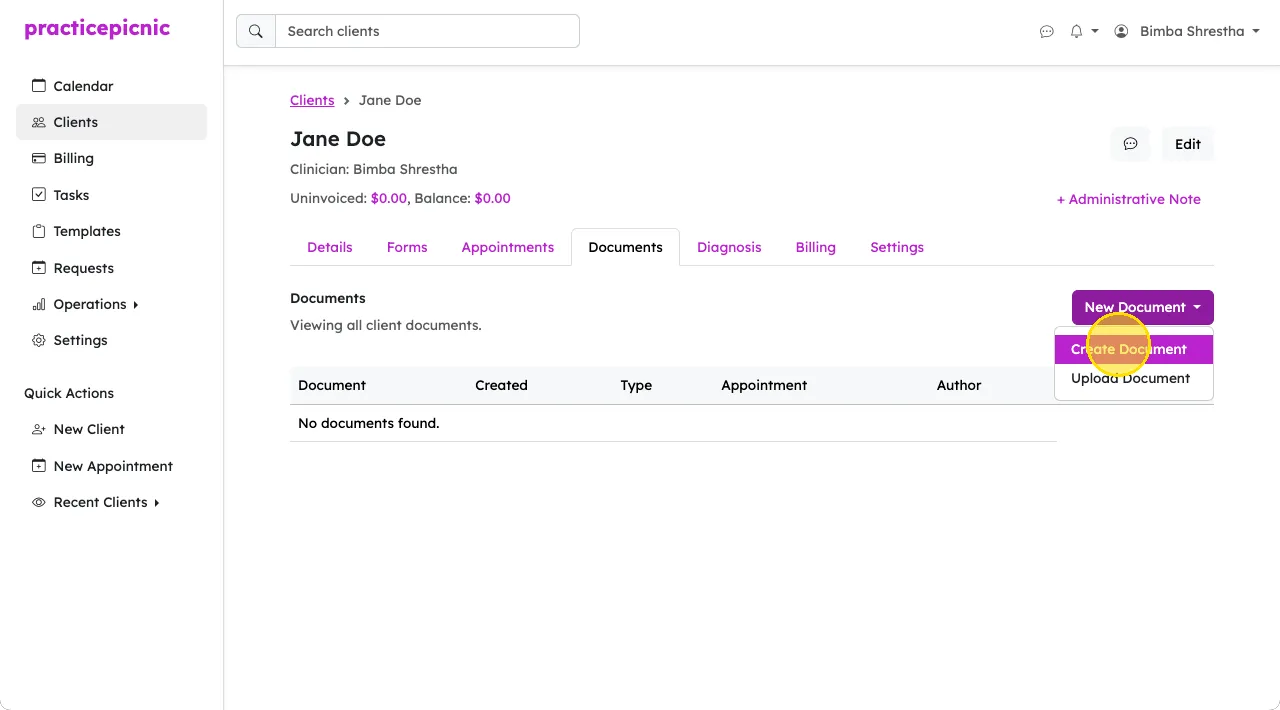
You can then select which appointment (if any) this document is being linked to, what type of document this is (progress note, treatment plan, etc.), and then which template this document is based on.
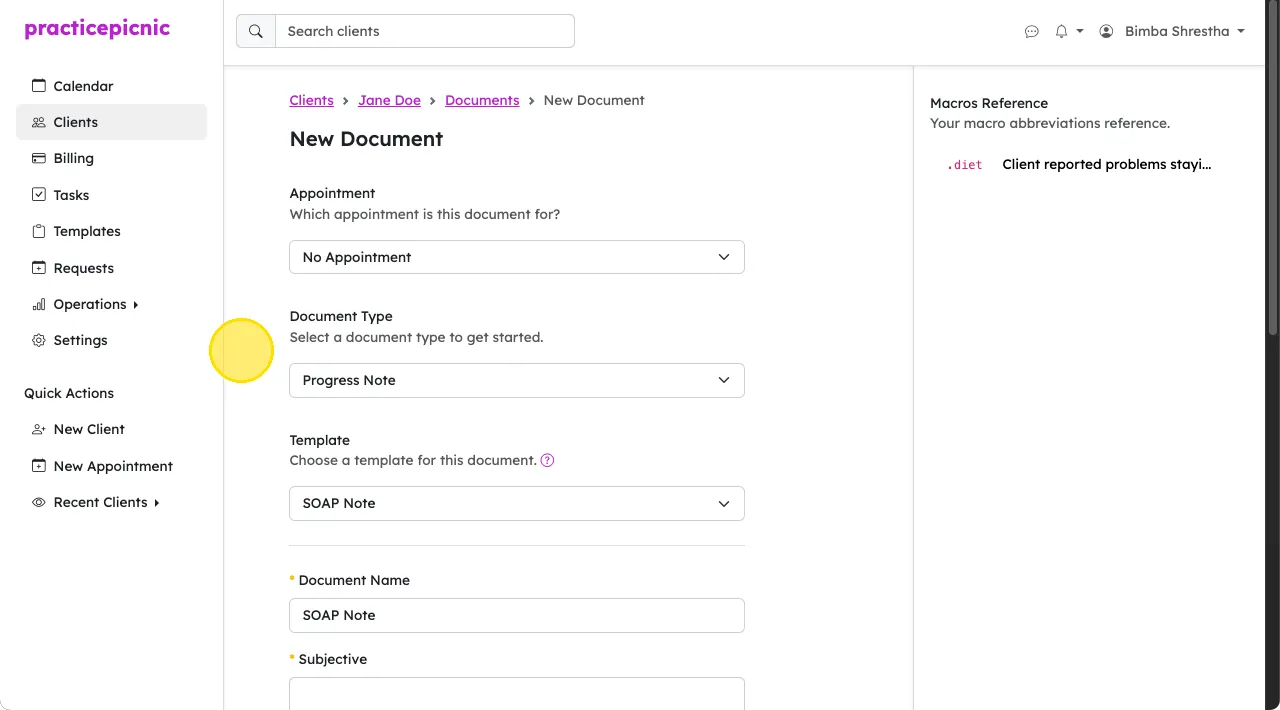
Note that templates do not auto-save. You have to click the Save button at the bottom to save templates.
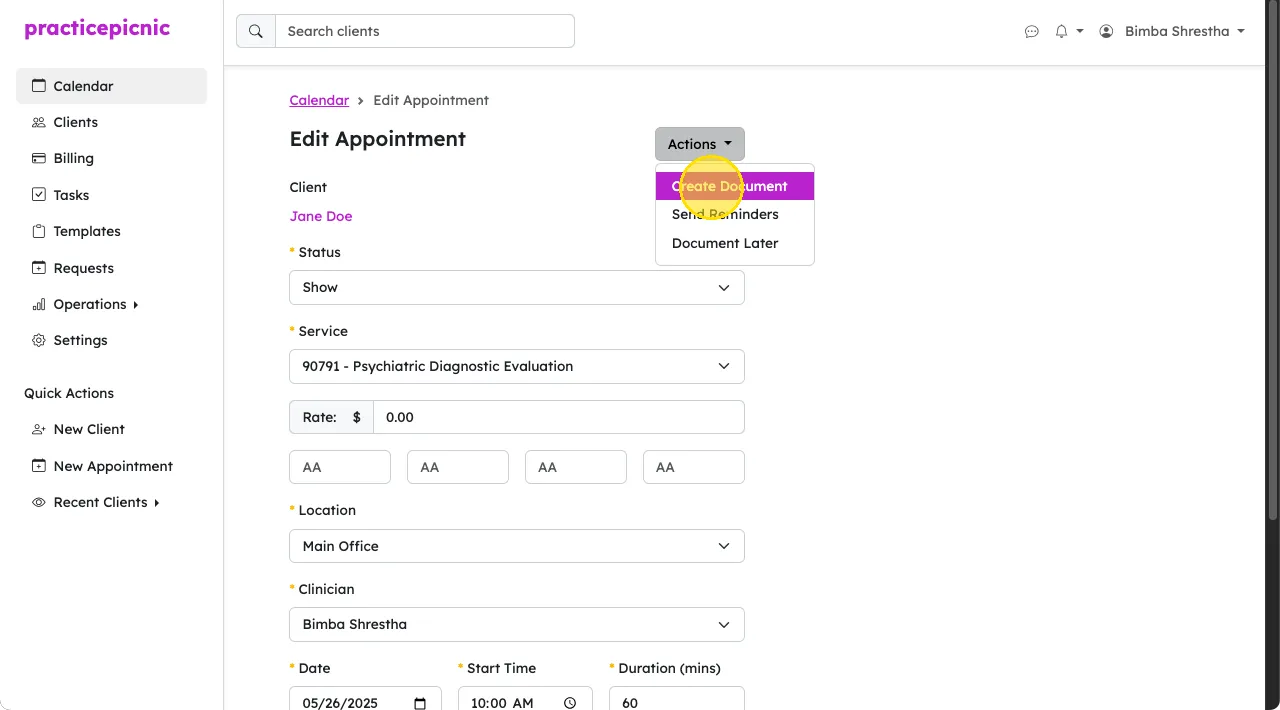
You can also create a document directly from the appointment page. Creating a document this way will automatically link the selected appointment to the new document.
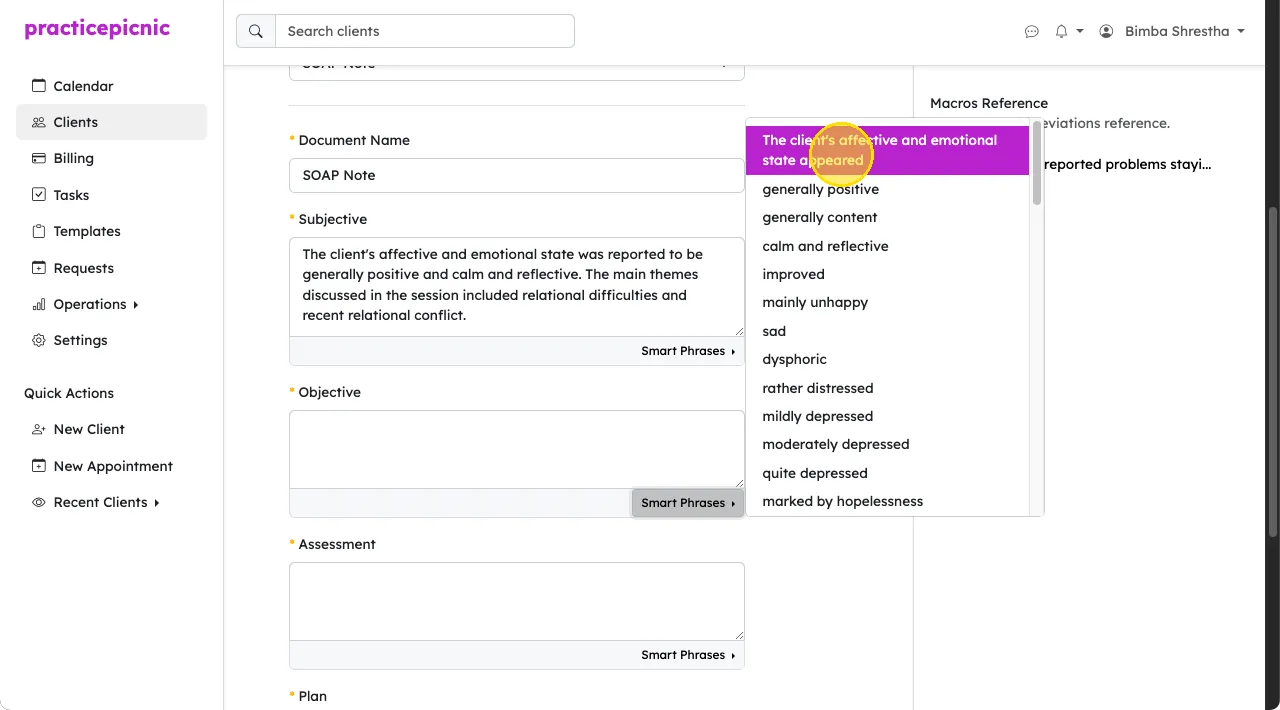
Using smart phrases
Smart phrases are commonly used text snippets that you can use to quickly fill out different portions of your documentation. During documentation, you can use the Smart Phrases dropdown on the bottom right of a text box to open up your phrase options. When you click on a phrase, it will populate into the text box. You can always edit the content of the textbox manually if you need.
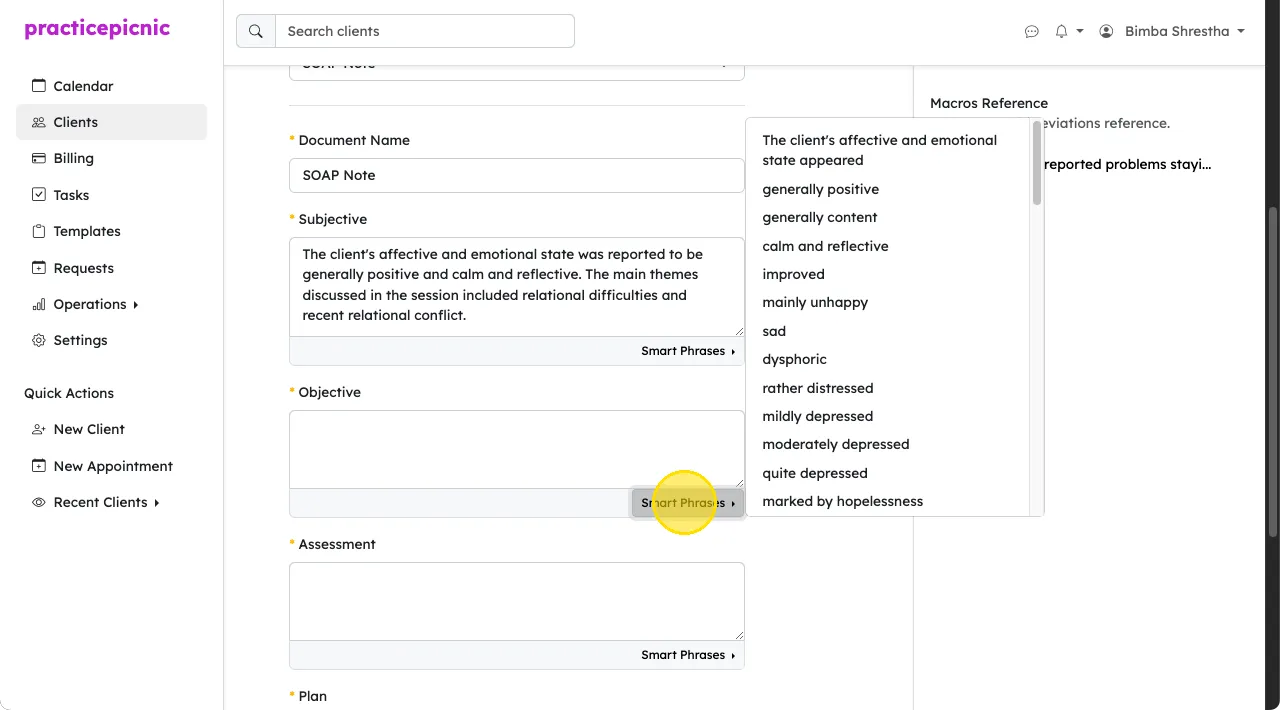
Then click on the phrase you want.
You can customize these smart phrases. See Document and form templates for details.
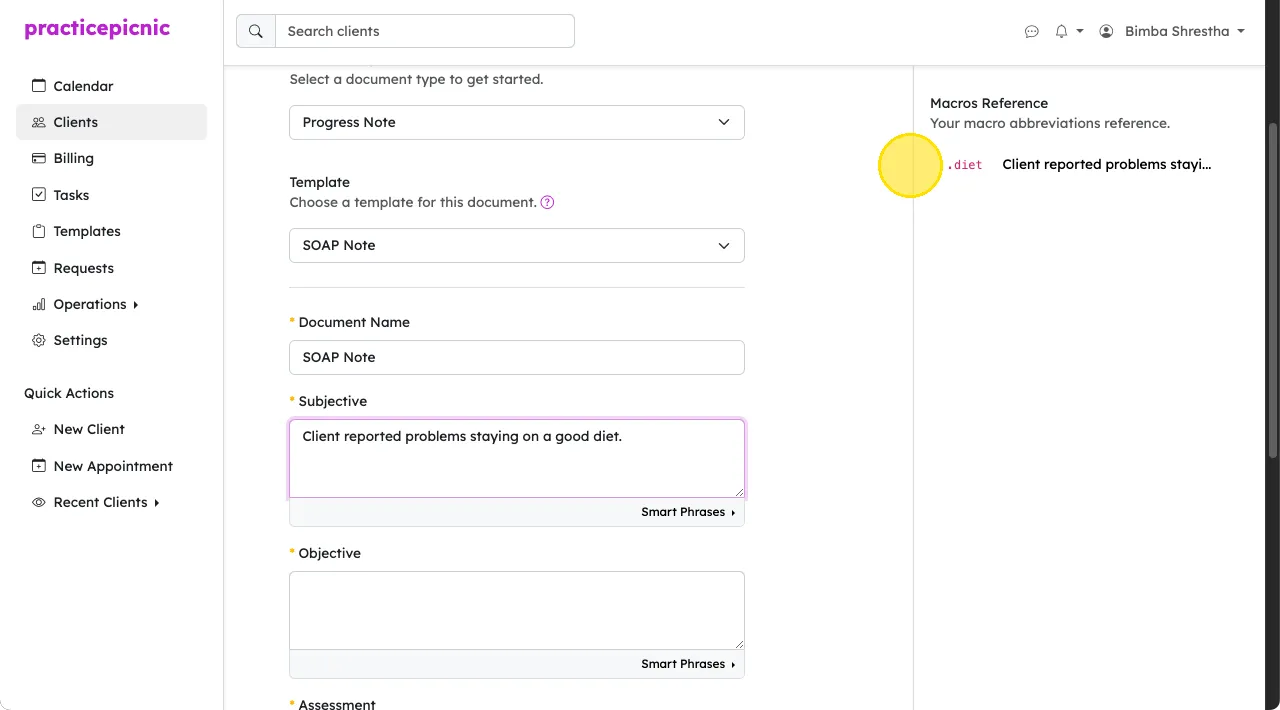
Using macros
Macros are similar to smart phrases in that they're commonly used text snippets that can be easily filled during documentation. The main difference is that they're accessed by typing in their associated abbreviation. The full text will then auto-expand after you hit the space bar.
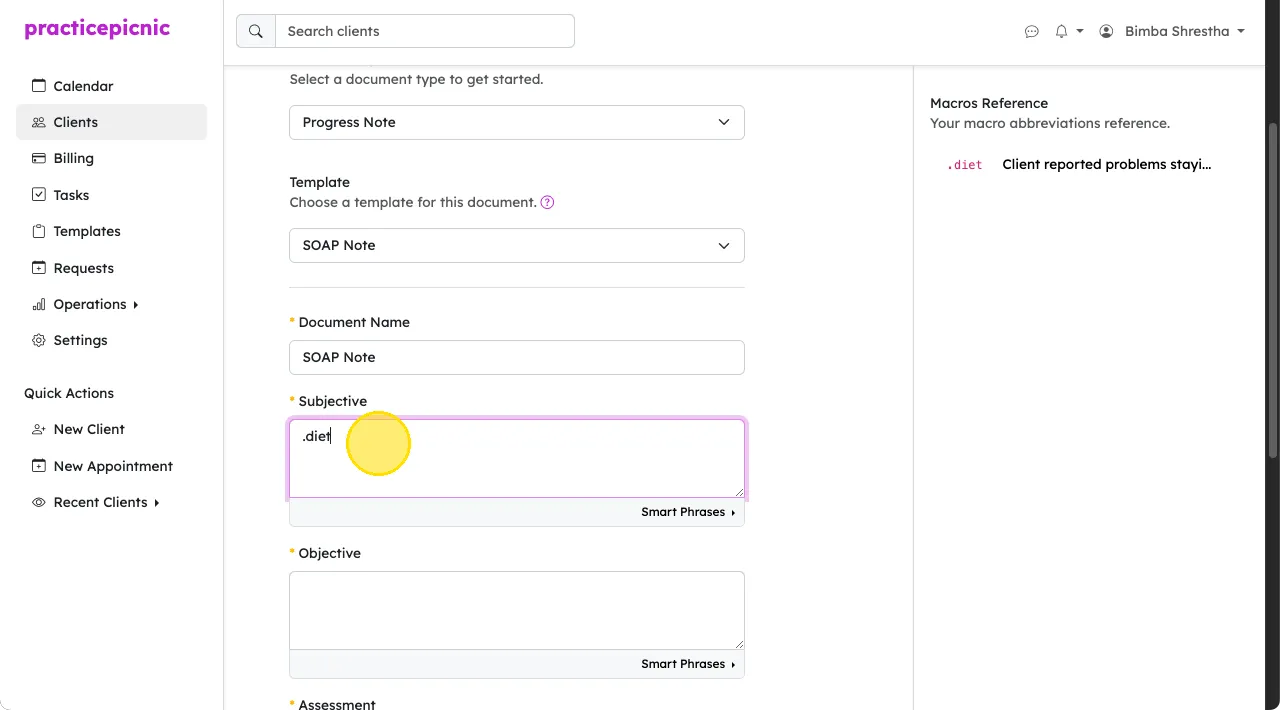
After hitting the spacebar, the text associated with the abbreviation gets filled in. A list of macros will appear on the left sidebar of the documentation page so that you know which macros are available for you to use.
Signing a document
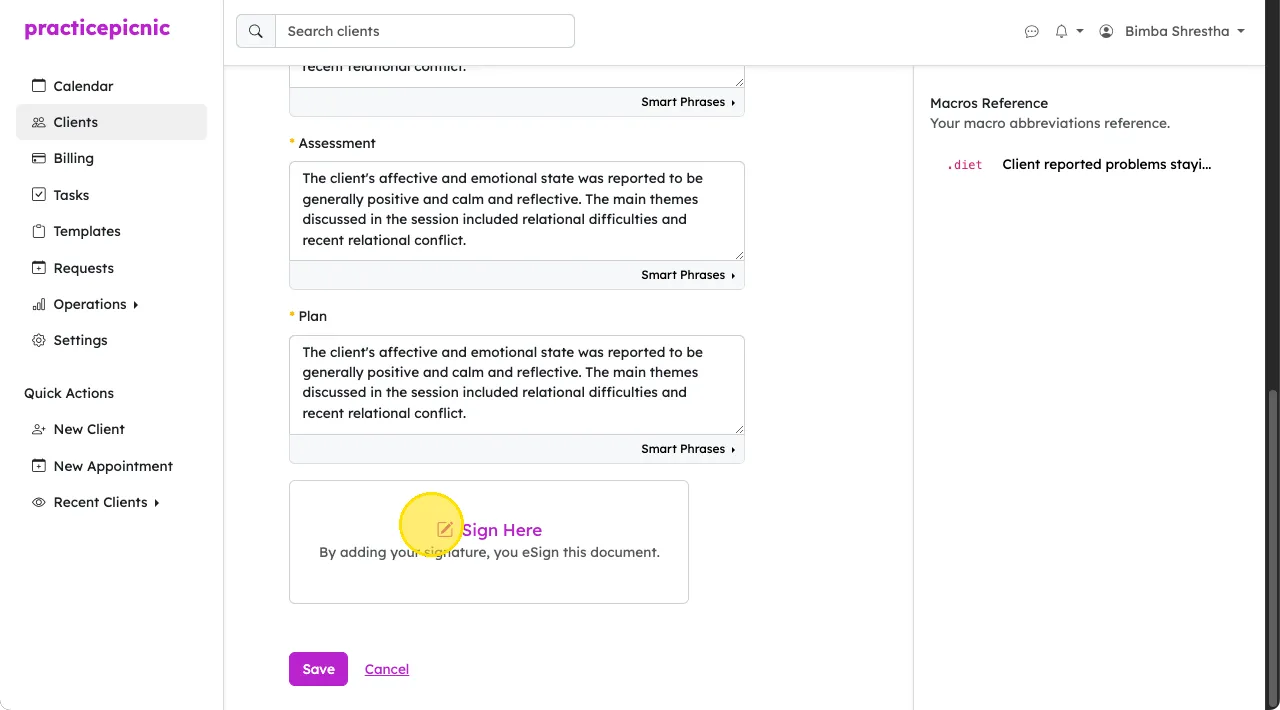
You can sign a document by clicking Sign Here at the bottom of the document page.
In the dialog box that pops up, you'll have to type your full name exactly as displayed into the text box.
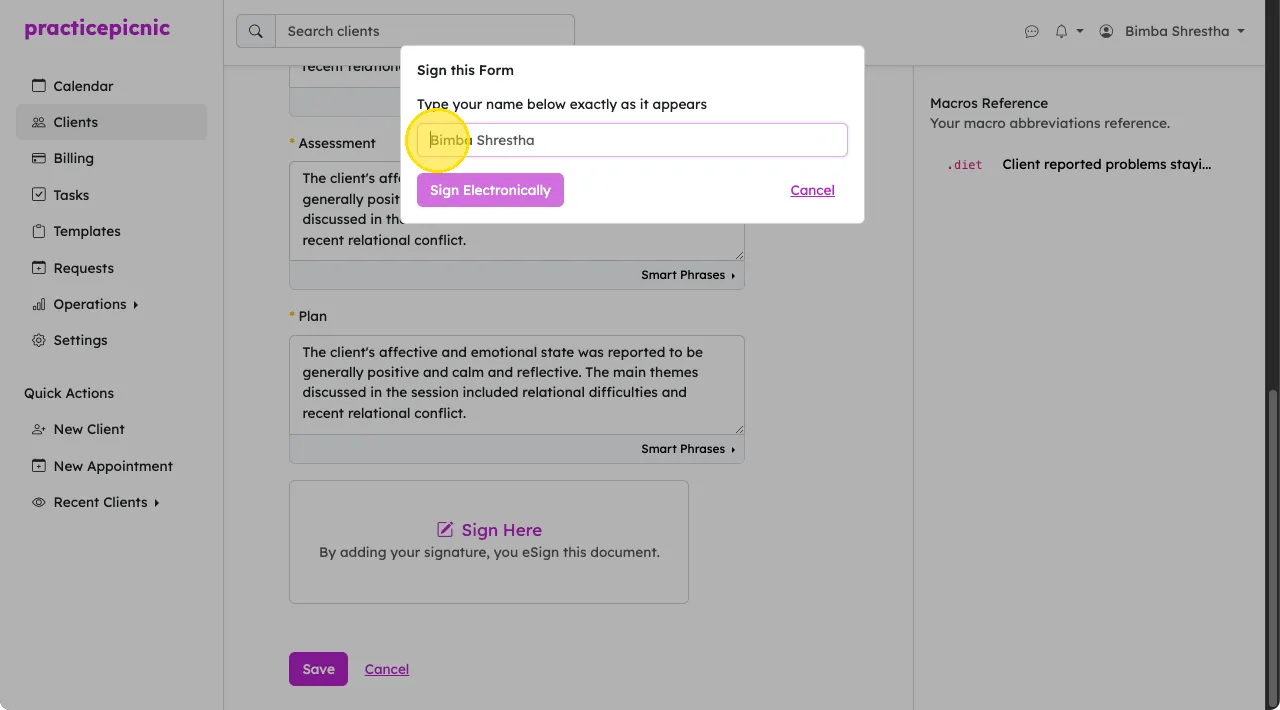
Note that although your name may appear in the textbox before you type anything, you still have to type your name in every time you sign a note. The name that you see is a placeholder.
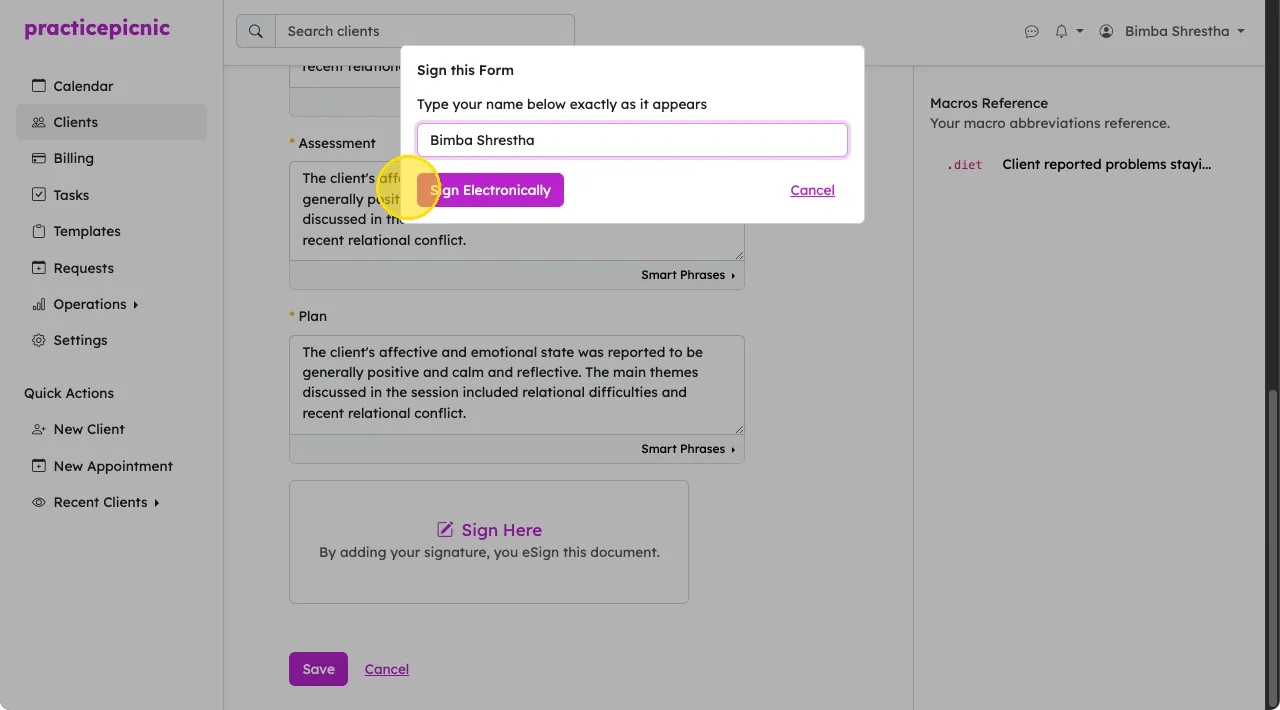
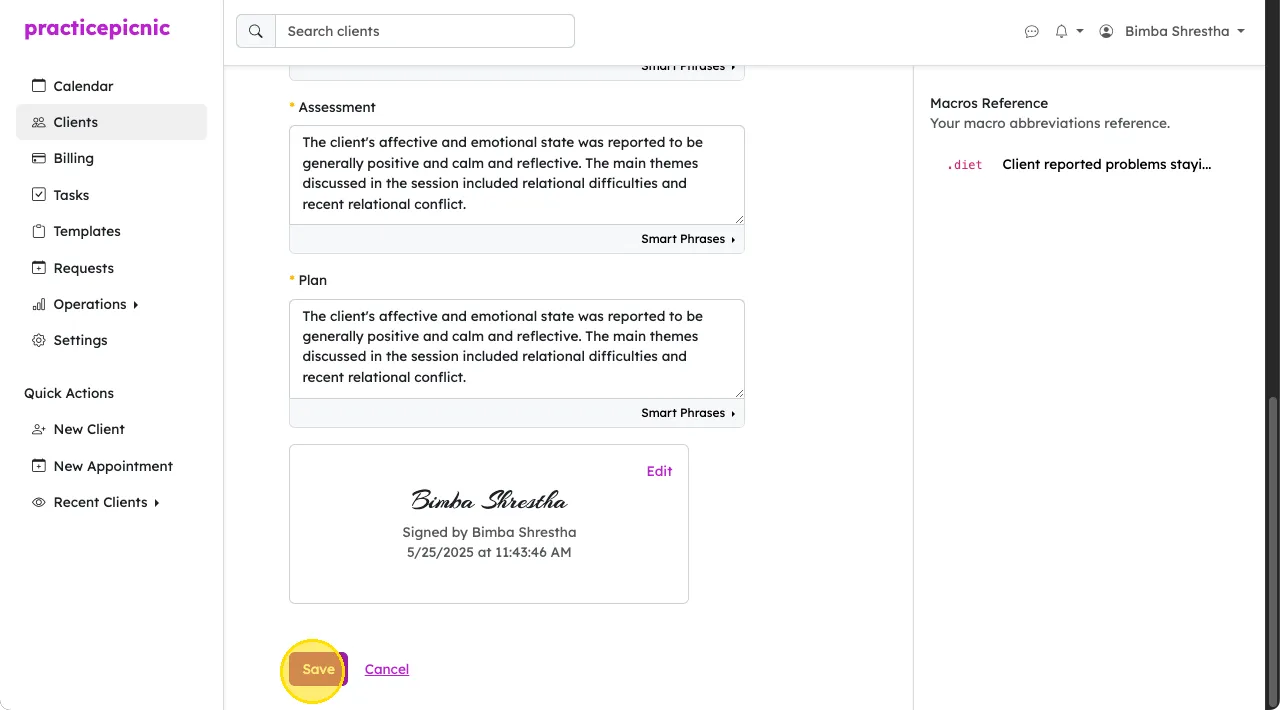
Then click Sign document and then Save the document. For a note to be signed, you have to do both: Sign the document and Save it.
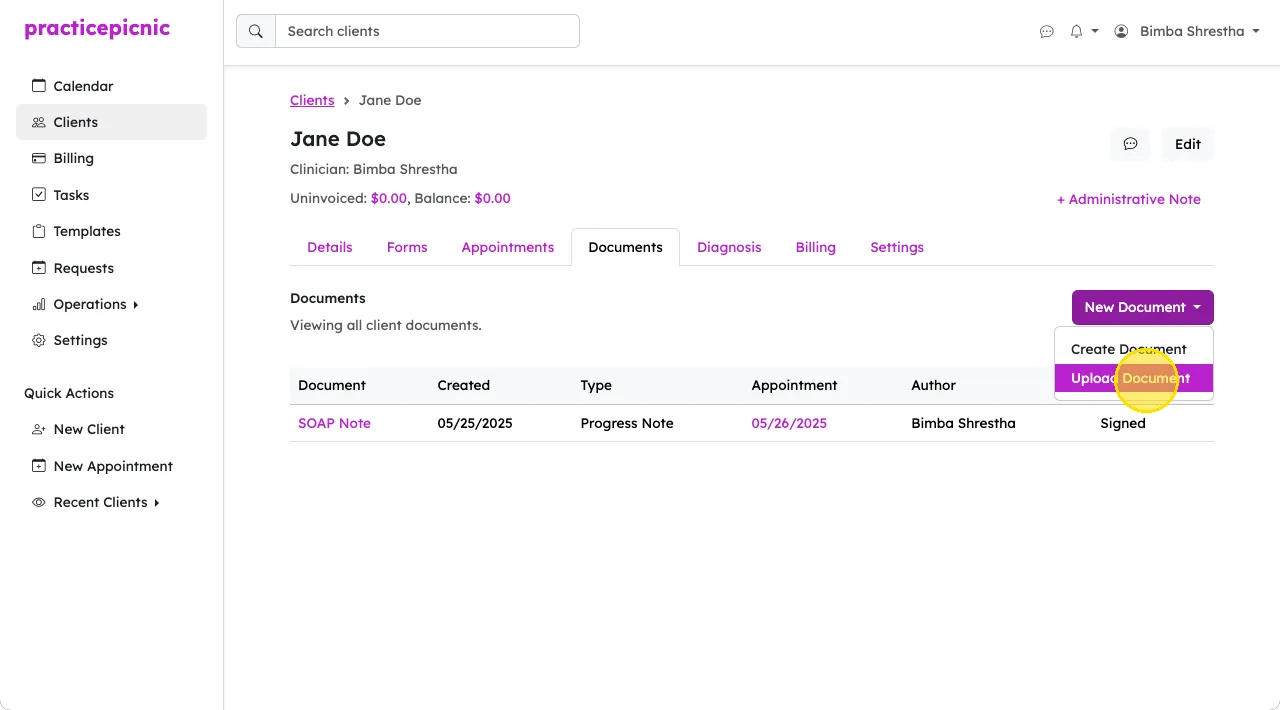
Uploading a document
You can also upload a document to a client's record from the client's Documents tab. For example, if you took your notes on a Word .docx file or if you took a picture of your handwritten notes, you can upload them here.
You can upload notes from your phone directly as well. Just access PracticePicnic from your phone's browser.
Printing, exporting and sharing notes
You can print a note by clicking on More > Print from the document's page.
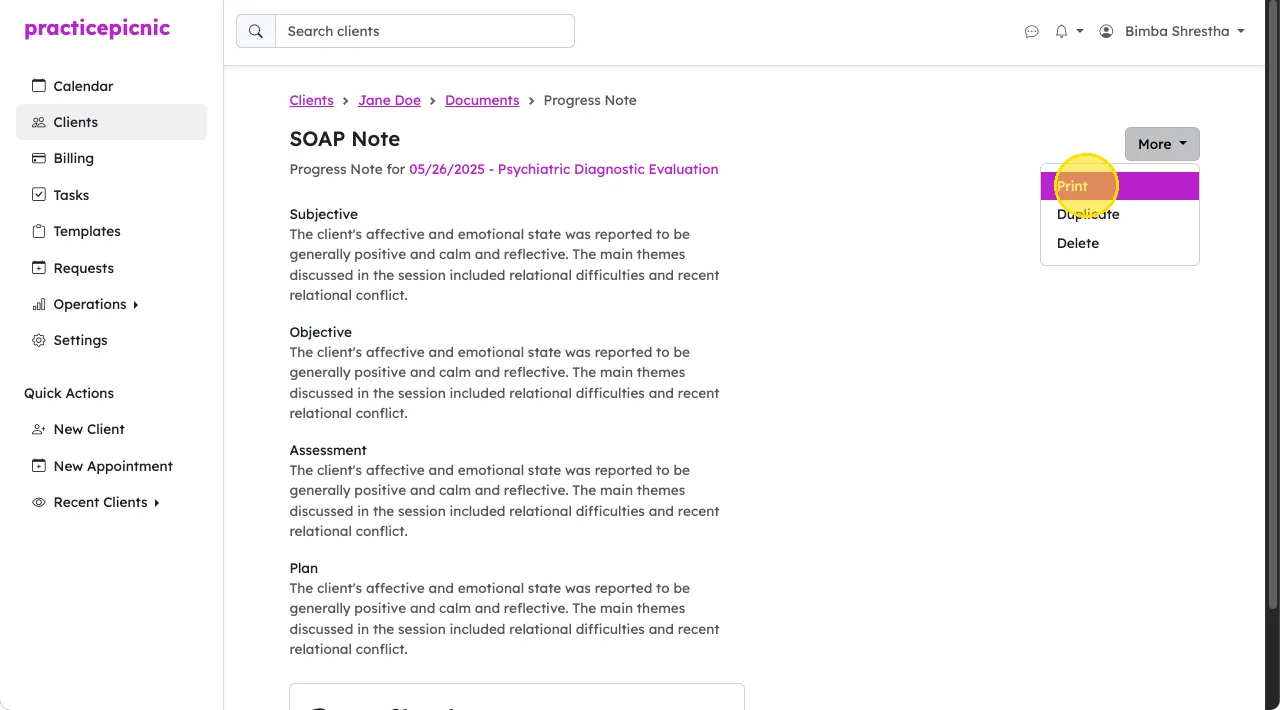
Depending on your browser, from the following screen, you can also save the note to PDF on your computer.
Session notes from AI
There are two ways to use AI in Practicepicnic:
- Ask the system to record your session and draft a well-formatted note.
- Type or dictate a brief summary of the session and ask the system to draft a well-formatted note.
Enable AI for your practice
To use Practicepicnic's AI features, you have to enable it for your practice. You can enable it from Settings > Automations.
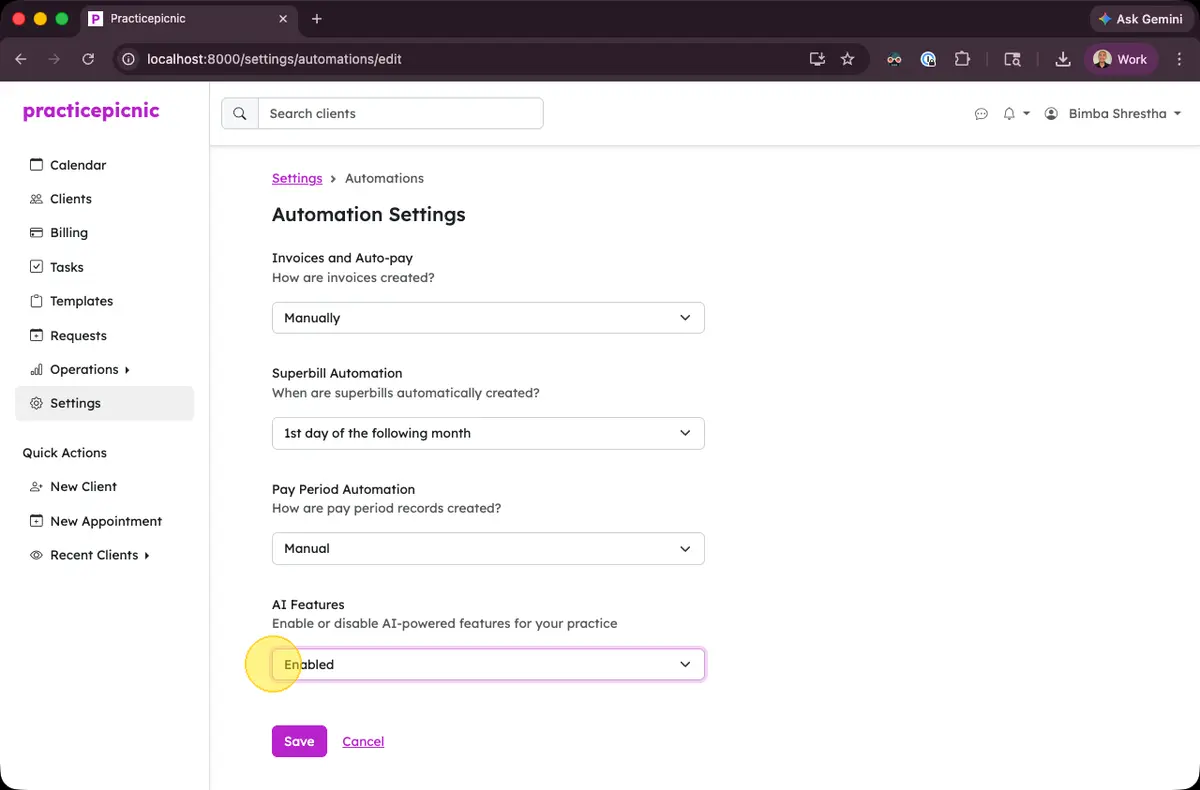
Note: if you do not see this option in your settings, contact your practice owner. They will be able to enable it for the practice.
Session notes from recordings
Recording your session
From your smartphone, log in to Practicepicnic and click on the appointment that you'd like to record from your calendar.
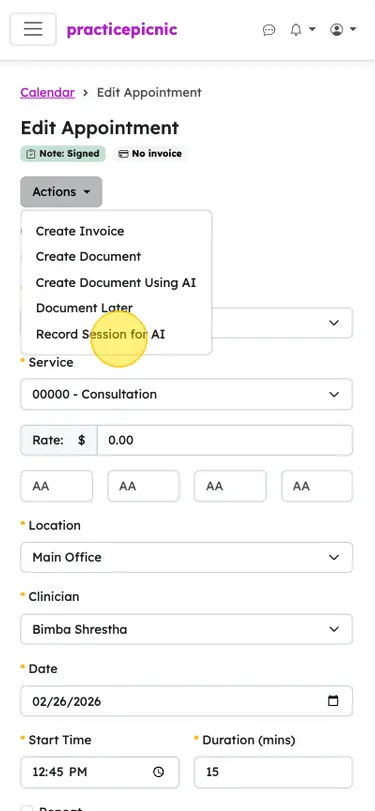
Click on More > Record Session for AI
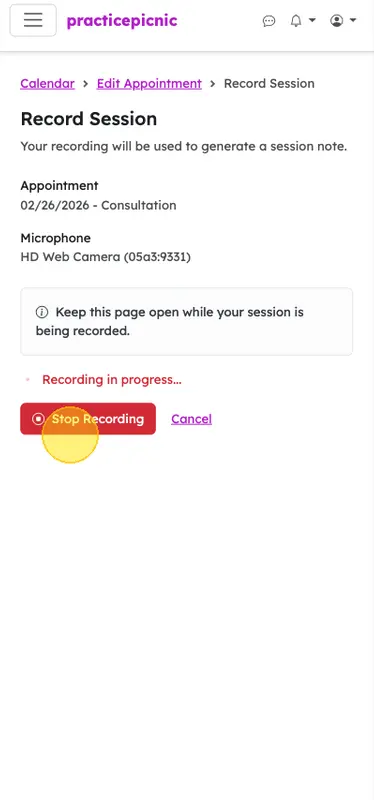
The system will request microphone access from your smartphone. Grant it. After granting microphone access, click on Start Recording when you're ready to begin the session.

While recording, leave the page open and do not put your phone to sleep. The system should automatically keep the phone's screen alive while recording is in progress.
Note: if the white screen is distracting during the session, you may wish to turn your phone face down on the table to prevent distractions.
After the session is complete, click Stop Recording.
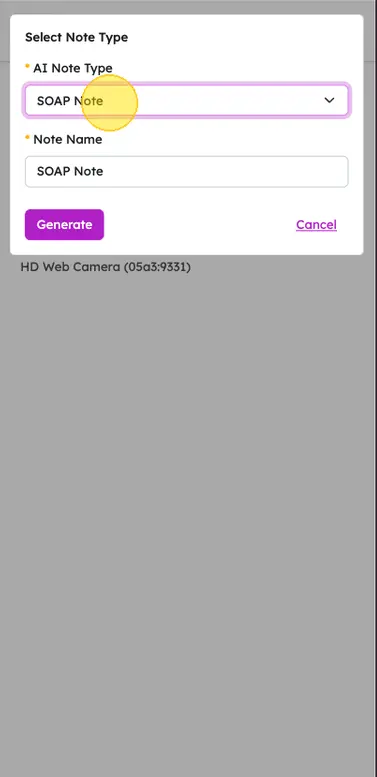
Select which type of note you'd like AI to help you draft and click Generate.
That's it. AI will use your session recording to generate a draft note for you to review. You will be notified when it's ready, usually within an hour or two.
Reviewing your note
Once your note is ready, you will receive a notification.

Click on it to review and sign your note.
Recording telehealth sessions
To record telehealth sessions, simply start the recording using the steps mentioned above on your smartphone while having the telehealth call on your computer. Your phone will record both your voice and your client's voice coming from your computer speaker.
Recording telehealth sessions while using headphones or earbuds is not currently supported. We will support this in the future, but for now, please avoid using headphones if you want to record your session for AI.
Session notes from typing / dictation
You can also type or dictate a brief summary of what happened in the session and AI will draft a well-formatted note for your review.
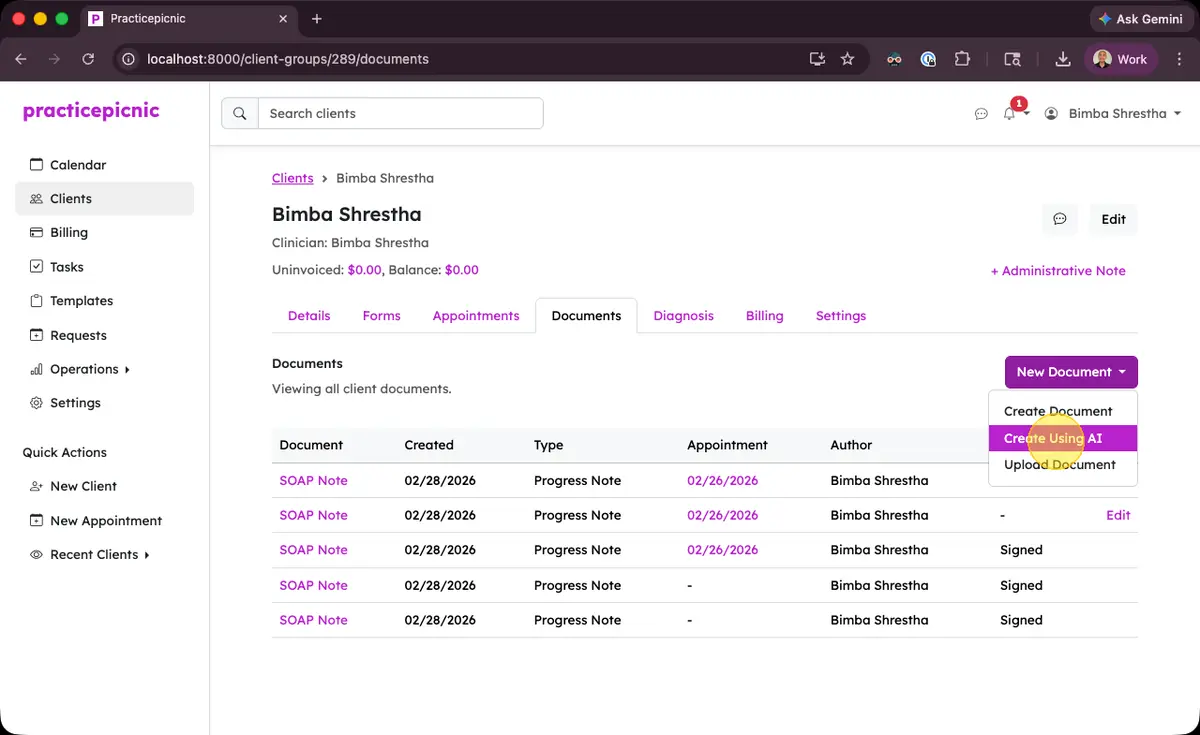
From the client's Documents tab, click New Document > Create Using AI.
Type a brief summary (1-3 sentences) in conversational language about the main items discussed in the session, select the type of note to generate and click Generate.
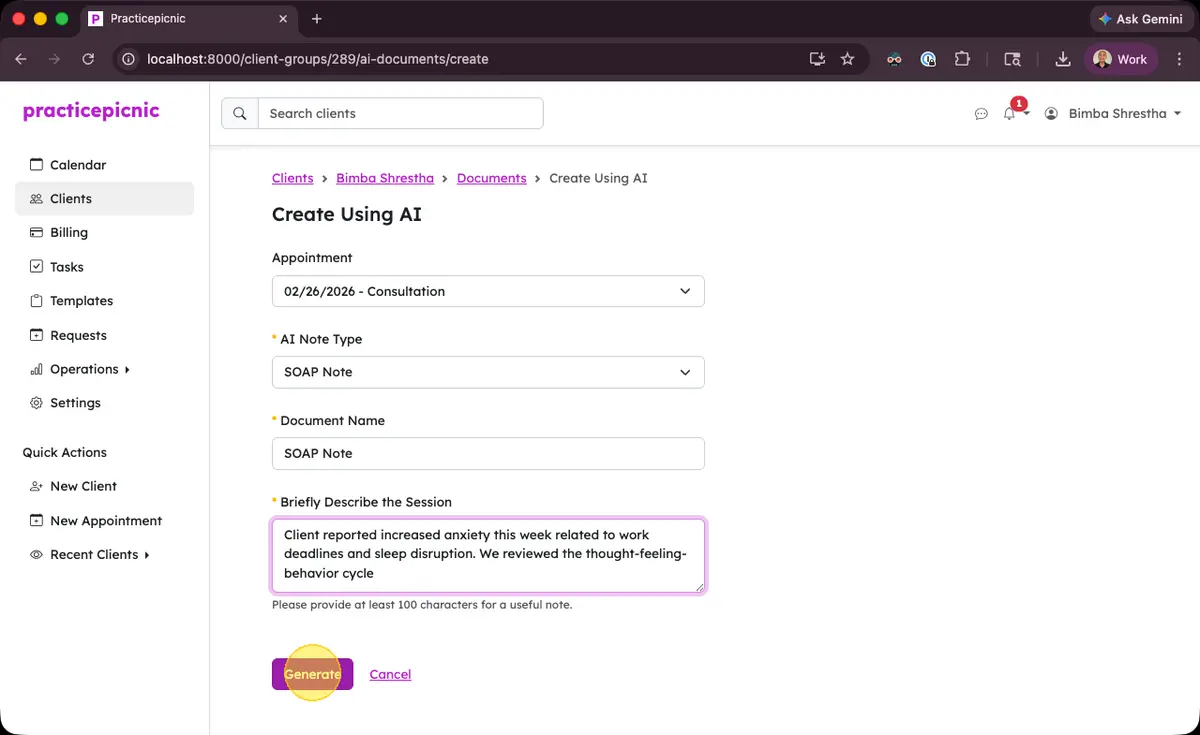
You don't have to worry about spelling, writing in complete sentences, or formatting. Simply capture the important clinical details and let AI handle the rest.
If you'd prefer to dictate, we recommend using your computer or smartphone's speech-to-text feature to help you quickly jot down what happened. Here are some instructions for doing this on different devices:
Your AI-generated draft will be ready to review immediately after clicking Generate.
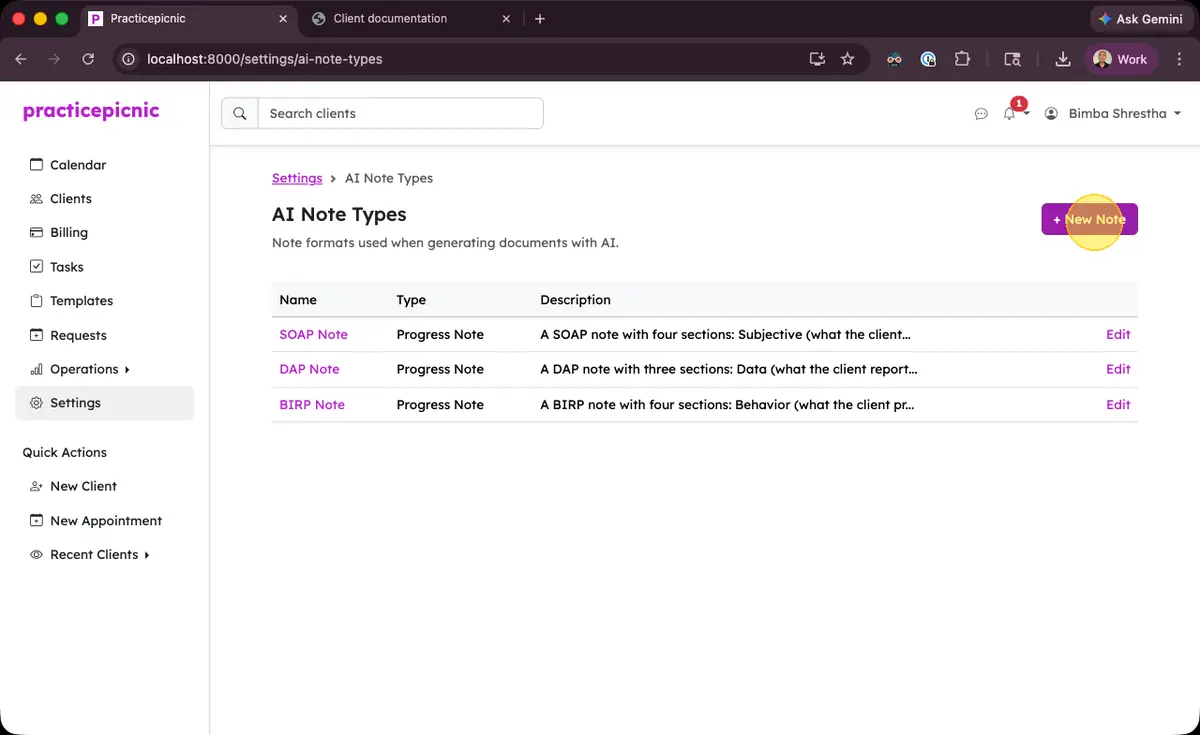
Customizing note types
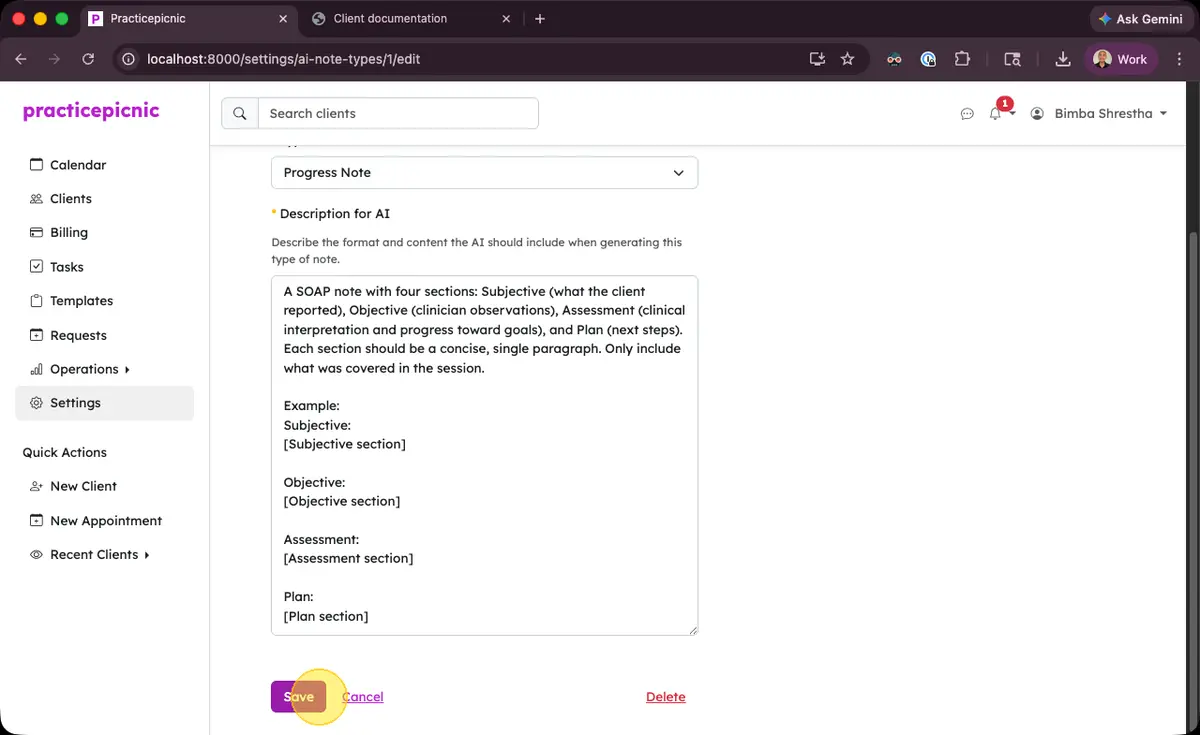
You can customize the types of notes AI can draft on your behalf from Settings > AI Note Types.

By default, the system includes configurations for SOAP, DAP and BIRP progress notes. You can edit the configuration by clicking Edit next to one of them. You can add a new note type by clicking New Note.
When creating a new note or editing an existing one, here are some things to keep in mind:
- Try to include an example output structure for your note. As you can see for our SOAP note, we've outlined how we want the note to be formatted. This way the AI will know what your formatting preferences are.
- Describe your note-taking style so that the AI can draft notes that are consistent with your past notes (e.g., refer to the client as "Client", keep notes concise, etc.)