Help center > Billing and payments > Invoicing and automation
Invoicing and automation
Practicepicnic handles billing through its simple invoicing system. In order to charge a client for an appointment or product, an invoice must be created (either manually or automatically by the system). An invoice can contain one or more appointments or products.
You can set up Practicepicnic to do billing in many different ways depending on your practice's needs. Below are some common ways to handle billing.
Per-session billing
The most common set up for billing in Practicepicnic is per-session billing. Clients are charged per session on the same day. If this is your first time setting up a billing system, we recommend you go with this approach.
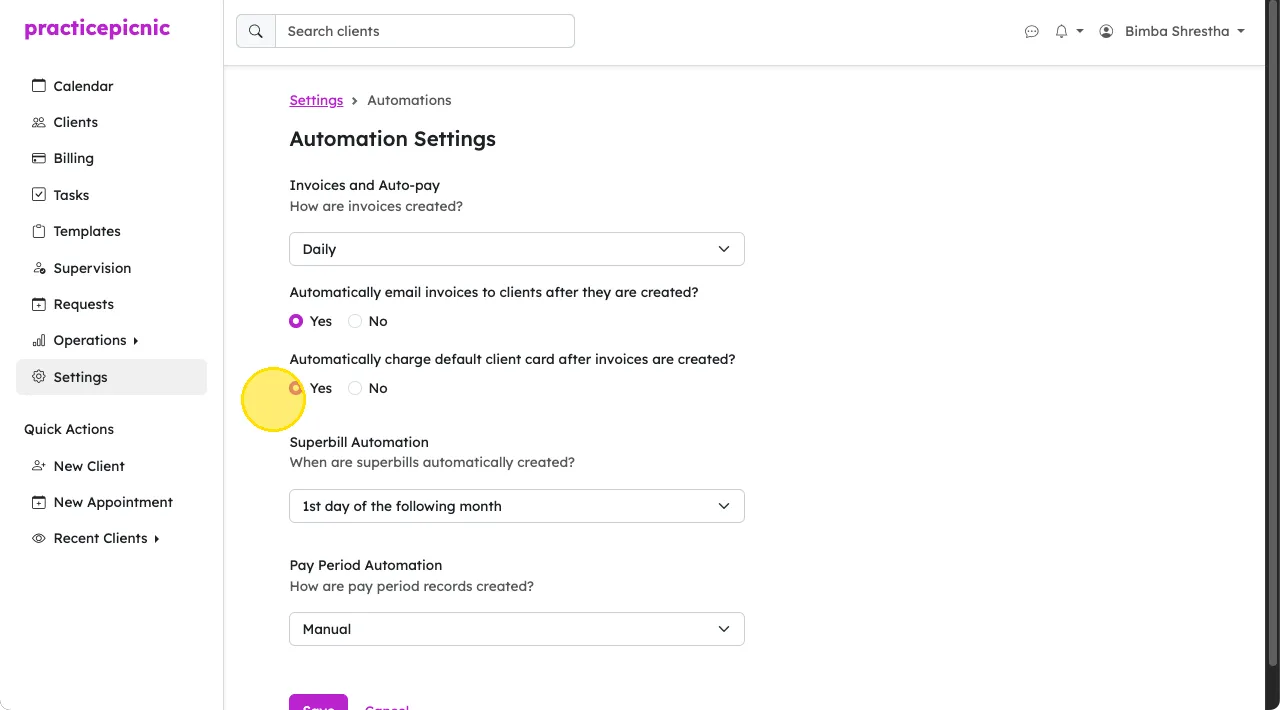
To set up this billing, from Settings > Automations, set Invoices and Auto-pay to Daily. You must be an Admin clinician or Practice manager to access this page.

Doing this will mean that:
- Every day at 11pm, the system will automatically create invoices for all the appointments you had that day.
- If you check Yes on automatically email invoices..., clients will receive an email with the invoice after it is created.
- If you check Yes on automatically charge..., the default card that clients have on file will be charged after the invoice is created.
- If you check Yes for this, the invoice emailed to clients will be marked as Paid
- You must have online payments set up through Stripe for your practice for this option to be visible.
To make this more concrete, let's walk through a typical day with this set up. Let's say you have the following set up in your practice settings (Daily invoice generation, auto-email, auto-pay).
And let's say you had one appointment today with a client whose card you already have on file. See the other Billing sections for help on how to collect client cards for payments.

Here is what will happen at 11pm:
- An invoice for the appointment will get created.
- The client's card will get charged for the appointment.
- The client will receive an email with a Paid invoice for their appointment.
Monthly billing
On the Settings > Automations page, you can choose to set your Invoices and Auto-pay setting to Monthly.
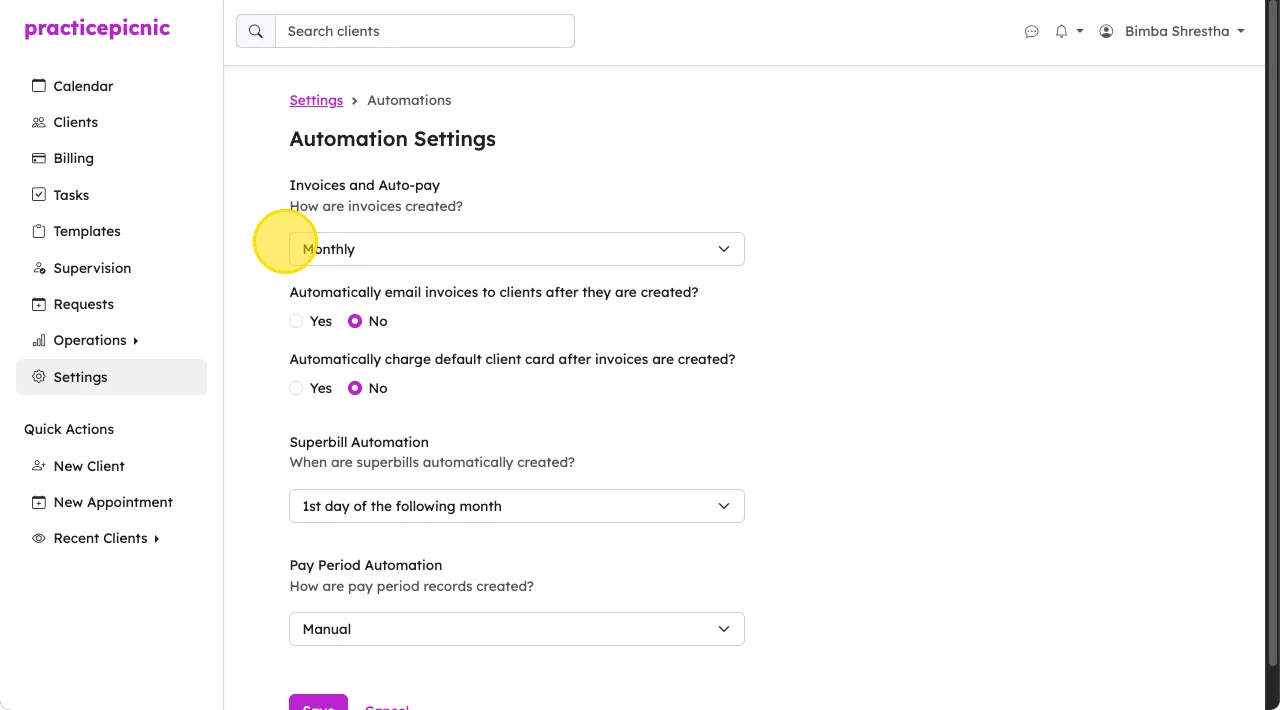
Doing this will mean that:
- On the first of every month, the system will automatically create invoices for all the appointments you had that month.
- Each appointment will not get its own invoice. All the appointments for a client will be included in one invoice.
- If you check Yes on automatically email invoices..., clients will receive an email with the invoice after it is created.
- If you check Yes on automatically charge..., the default card that clients have on file will be charged after the invoice is created.
- If you check Yes for this, the invoice emailed to clients will be marked as Paid
- You must have online payments set up through Stripe for your practice for this option to be visible.
Manual billing
On the Settings > Automations page, you can choose to set your Invoices and Auto-pay setting to Manually. Doing this will mean that invoice creation and payment processing must be done manually for appointments.
To manually invoice and charge a client, click on the appointment you'd like to charge for.
Click More > Create Invoice.
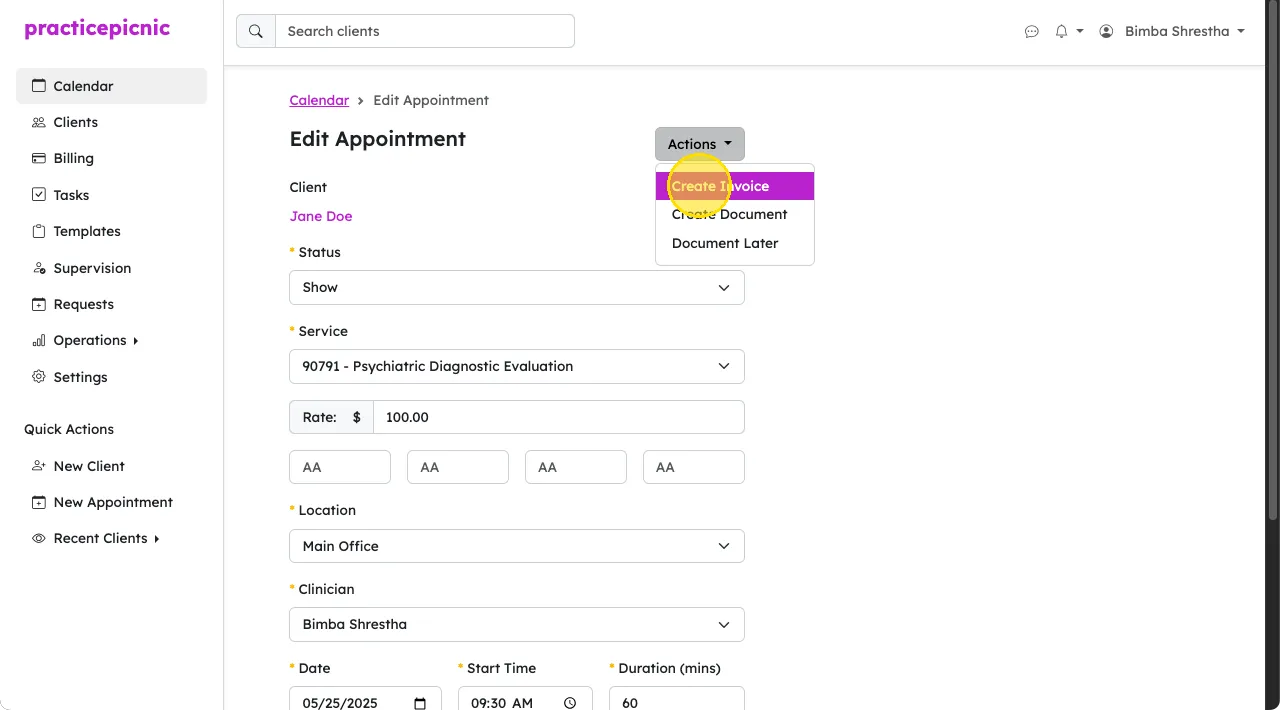
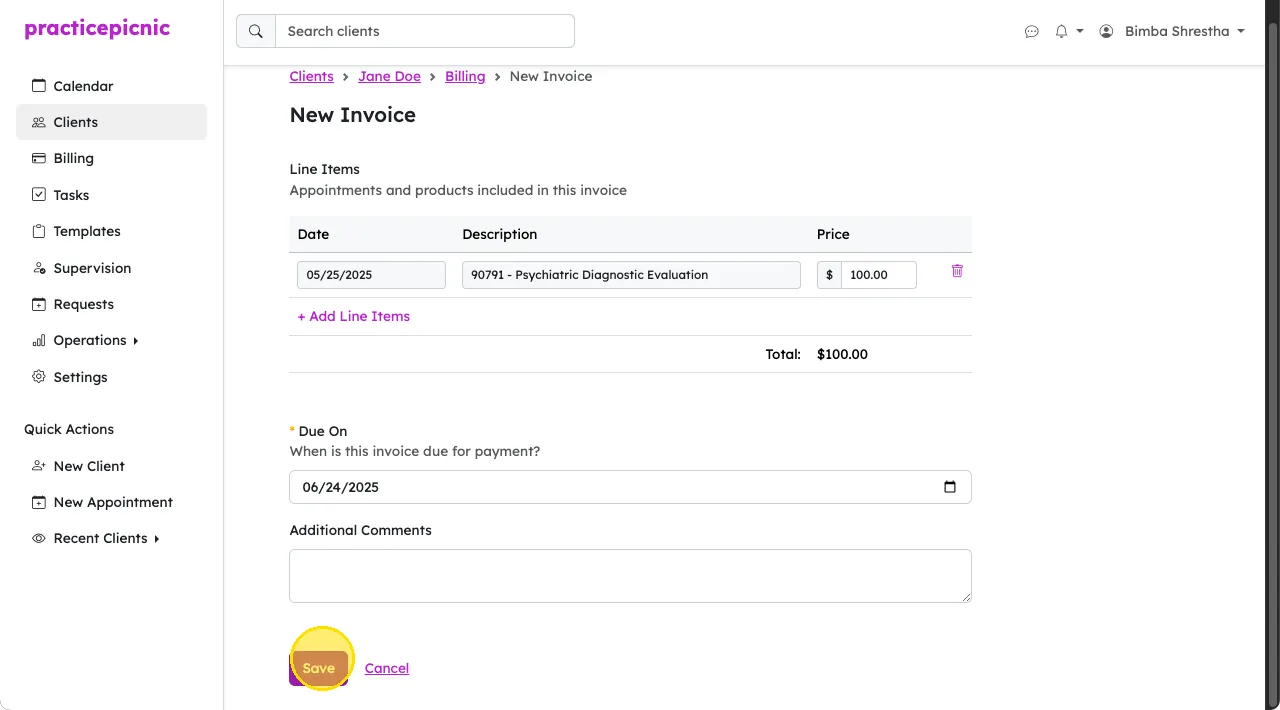
Click Save.
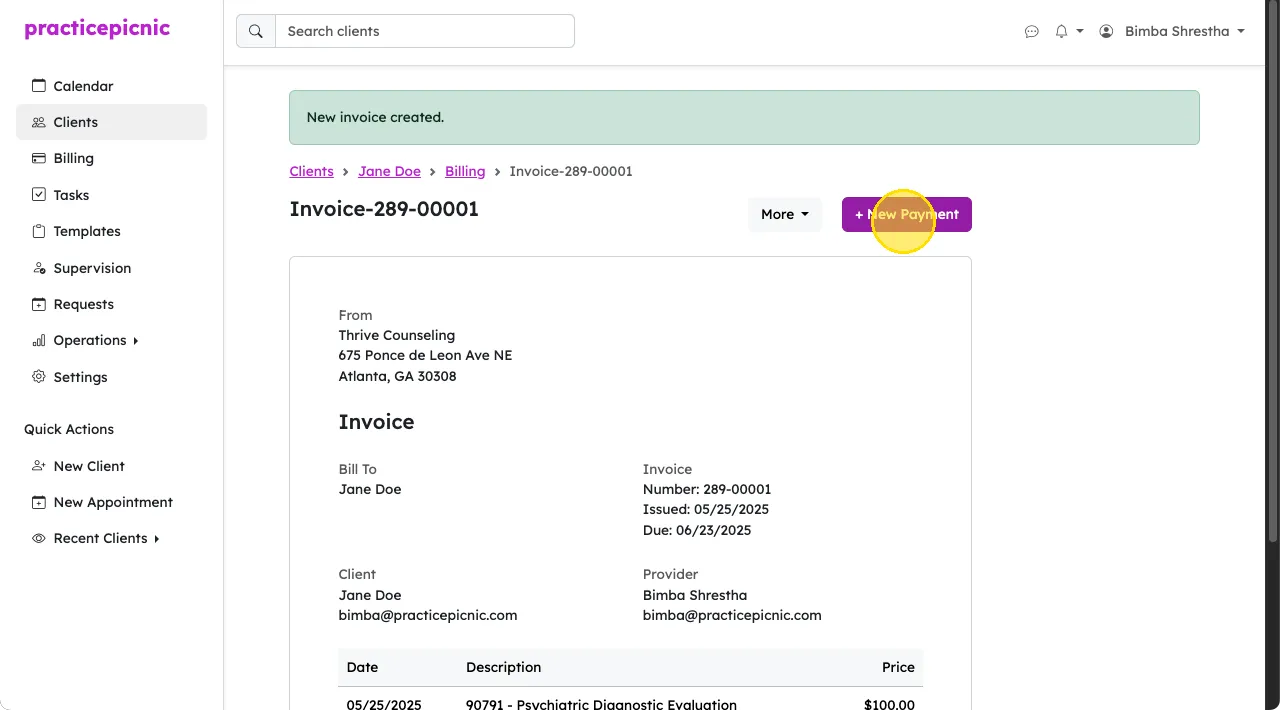
Once the new invoice is created, click New Payment.
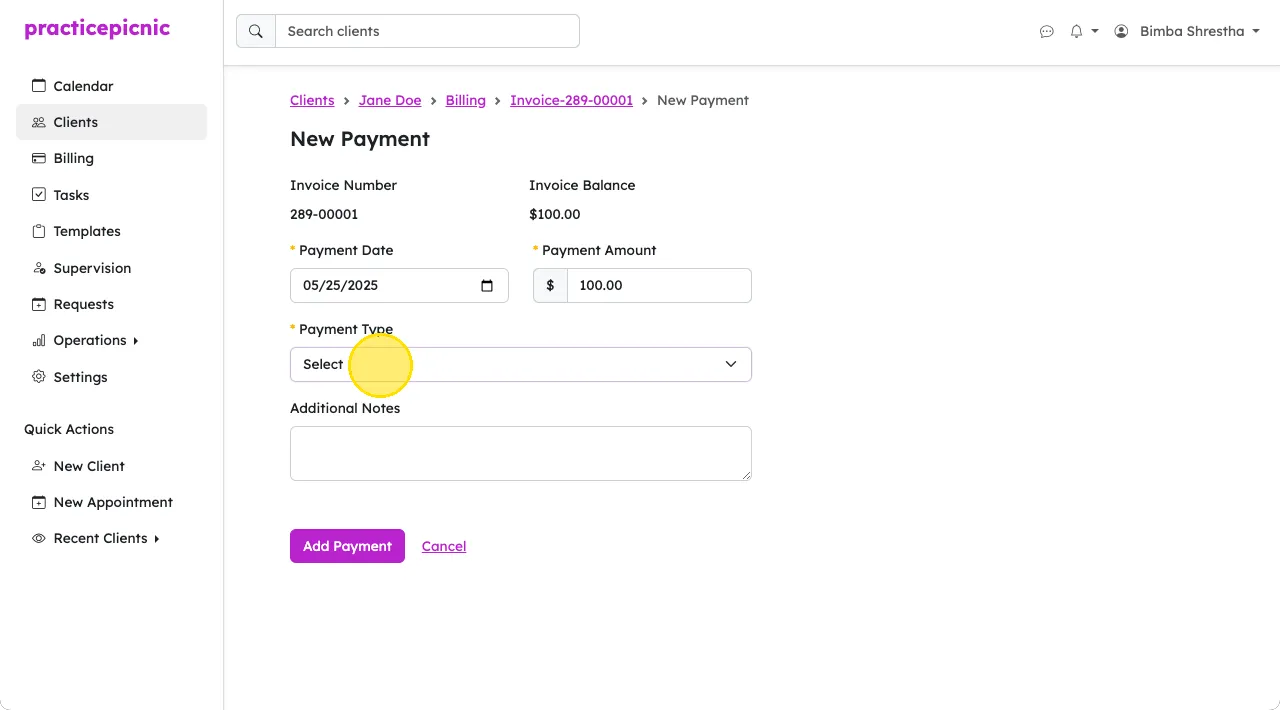
Select the type of payment this is. Your options are:
- Cash: For physical cash payments.
- Check: For physical check payments.
- Selecting this will allow you to input a check number.
- Card: For charging a card the client has on file through Practicepicnic.
- Selecting this will allow you to select which of the cards on file for the client to charge.
- External Card: If the card payment was collected outside Practicepicnic (through another payment processing system).
Once you're done, click Add Payment to complete adding a payment to the invoice.
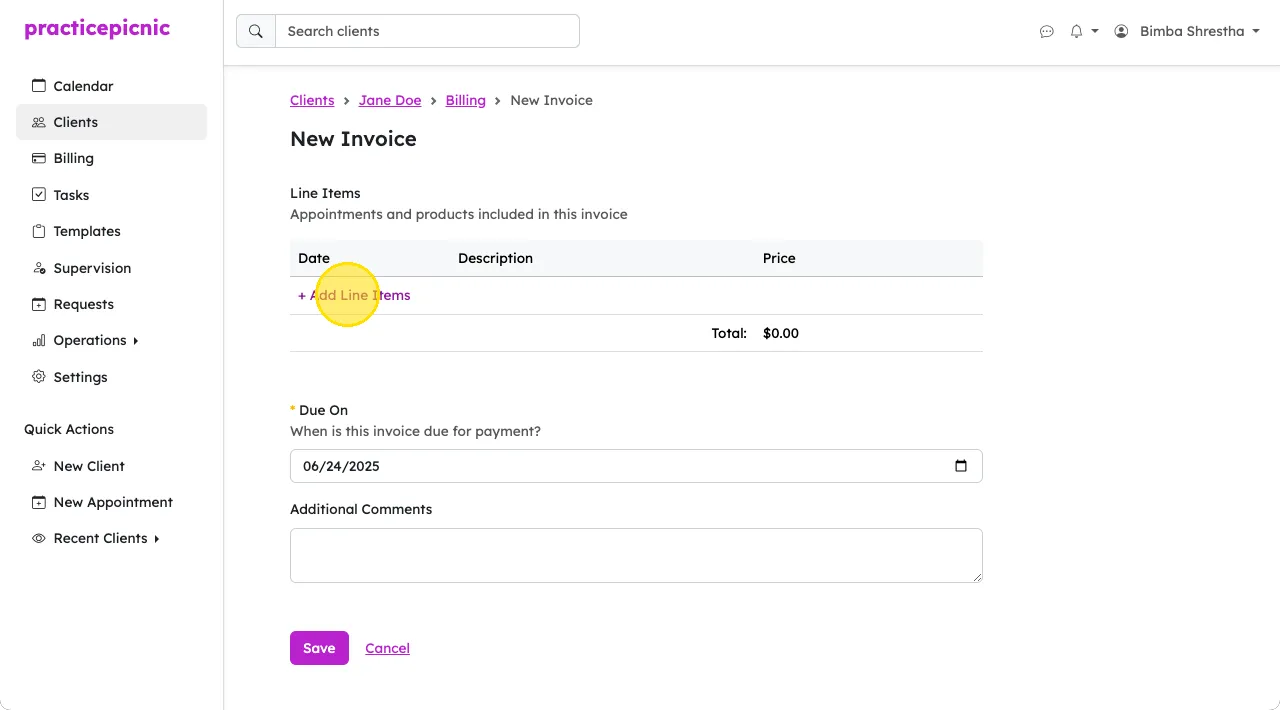
You can also create an invoice directly from the client's Billing tab. This is useful if you want to create an invoice that contains two or more appointments.
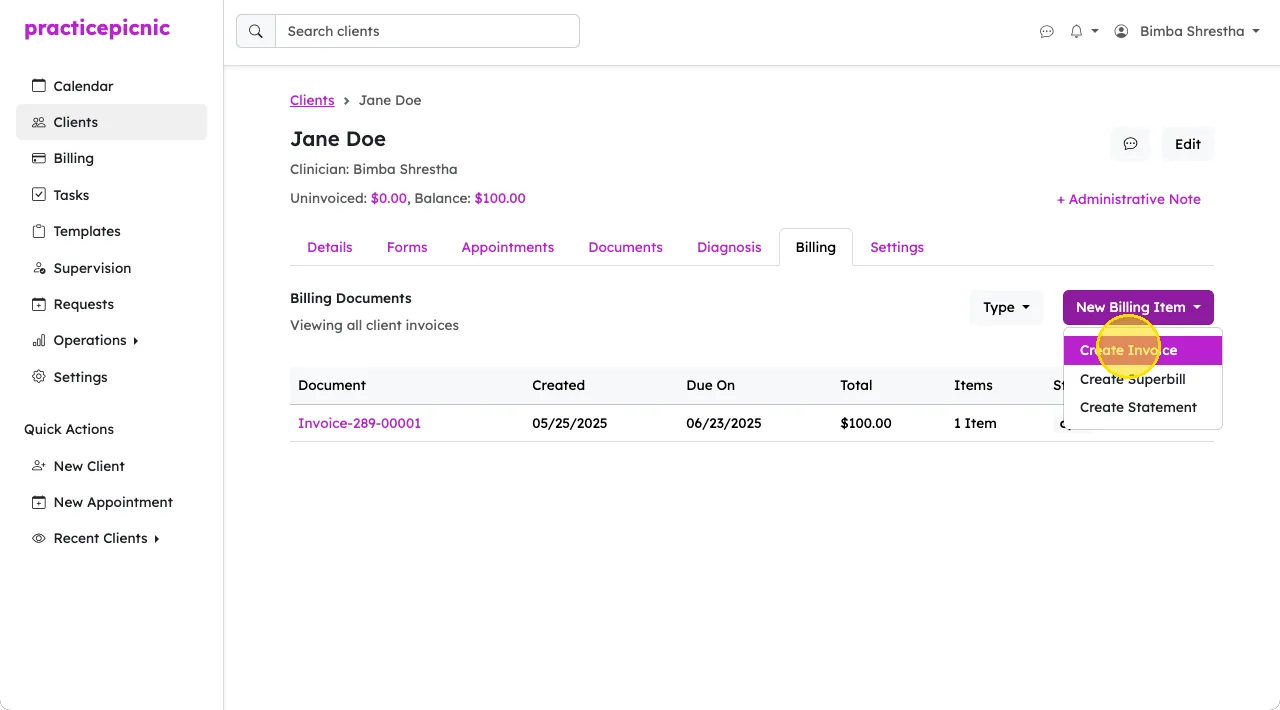
From the new invoice page, you can click Add Line Items and select which appointments you'd like to include in this invoice.
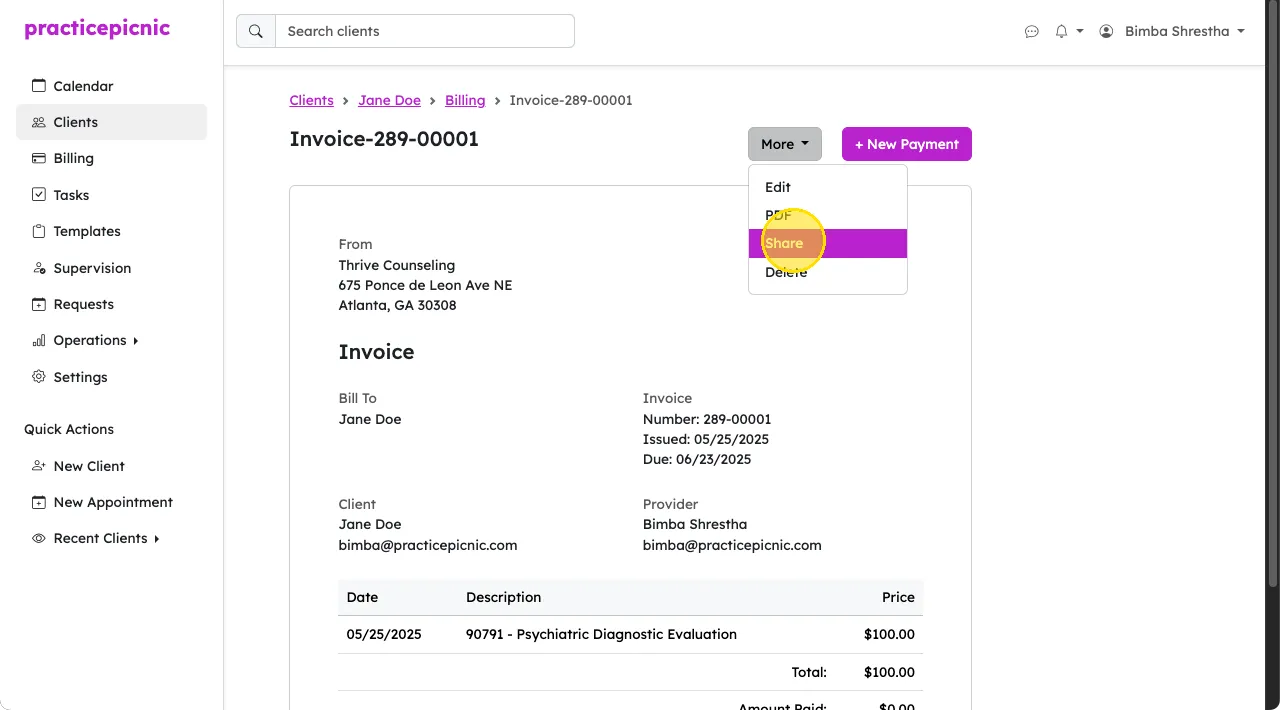
Finally, you can share an invoice with a client by clicking More > Share from the invoice page.