Help center > Billing and payments > Online payments
Online payments
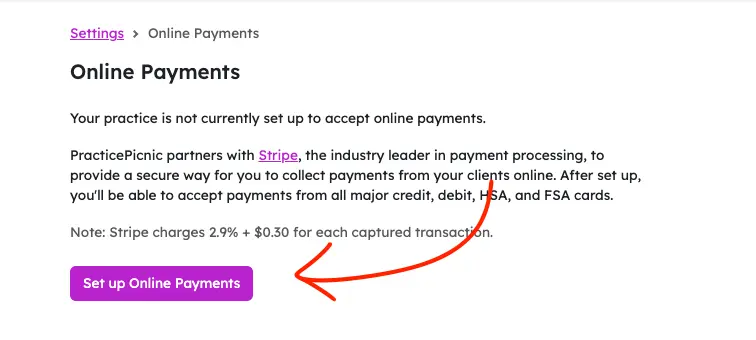
Practicepicnic partners with Stripe, the industry leader in payment processing, to provide a secure way for you to collect payments from your clients online. After set up, you'll be able to accept payments from all major credit, debit, HSA, and FSA cards.
Follow these steps if you'd like to use Practicepicnic to charge client credit cards. If you only accept payments in cash, check or via another payment processor, you can skip these steps. Note that you can still track those payments in Practicepicnic to keep everything organized.
First, navigate to Settings > Online Payments.
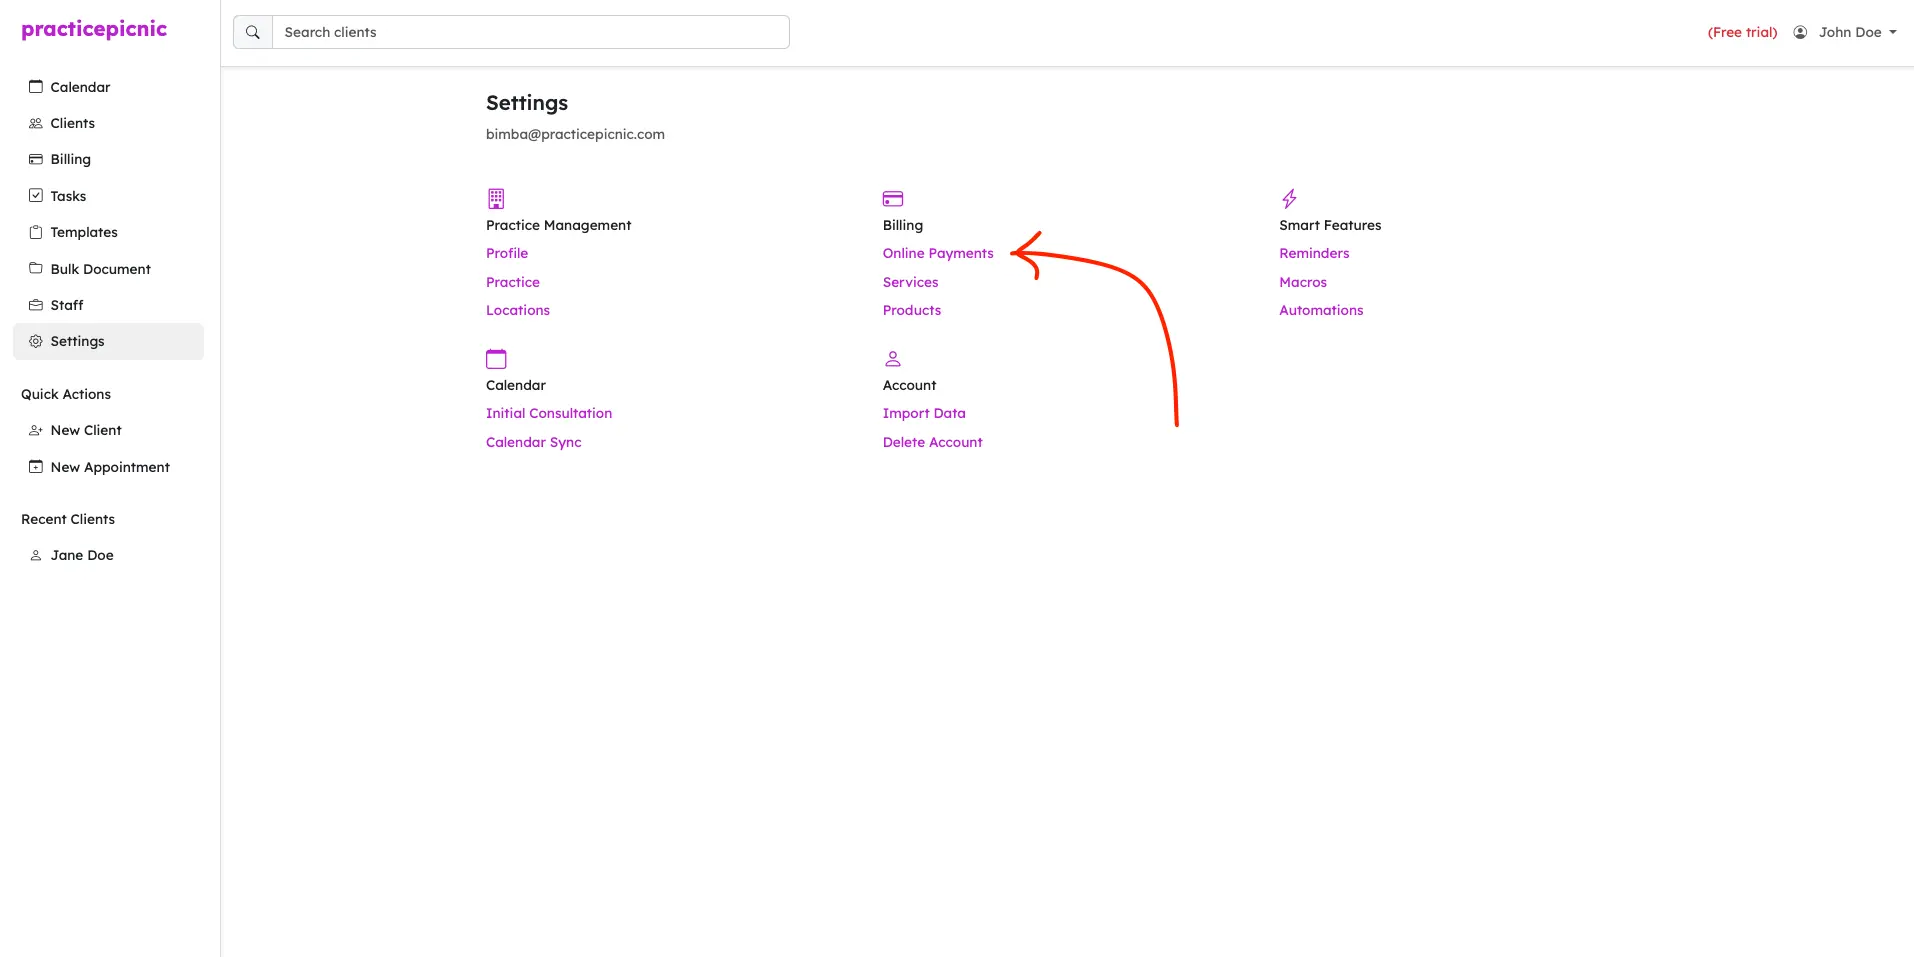
Then, click on the "Set Up Online Payments" button.
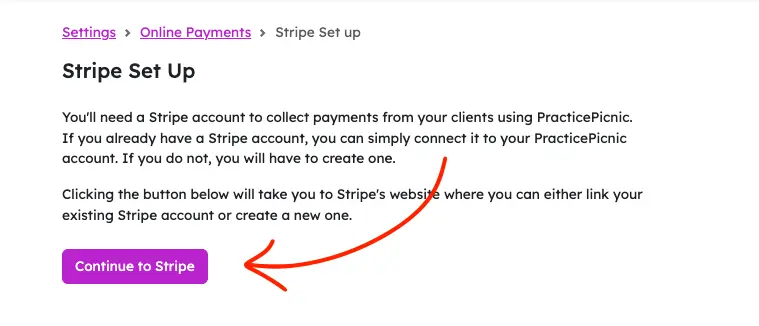
You'll need a Stripe account to collect payments from your clients using PracticePicnic. If you already have a Stripe account, you can simply connect it to your PracticePicnic account. If you do not, you will have to create one.
Click on the "Continue to Stripe" button to connect to Stripe.
You'll be taken to the Stripe website to complete the rest of the setup.
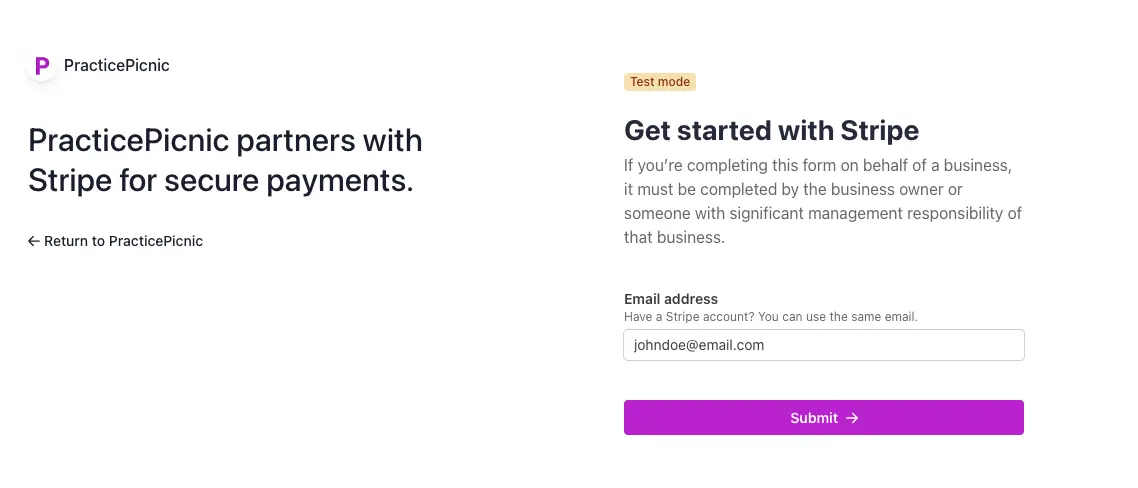
Enter your email address and click "Submit".
If the email you entered is associated with an existing Stripe account, you'll be asked to log in to your Stripe account and connect it.
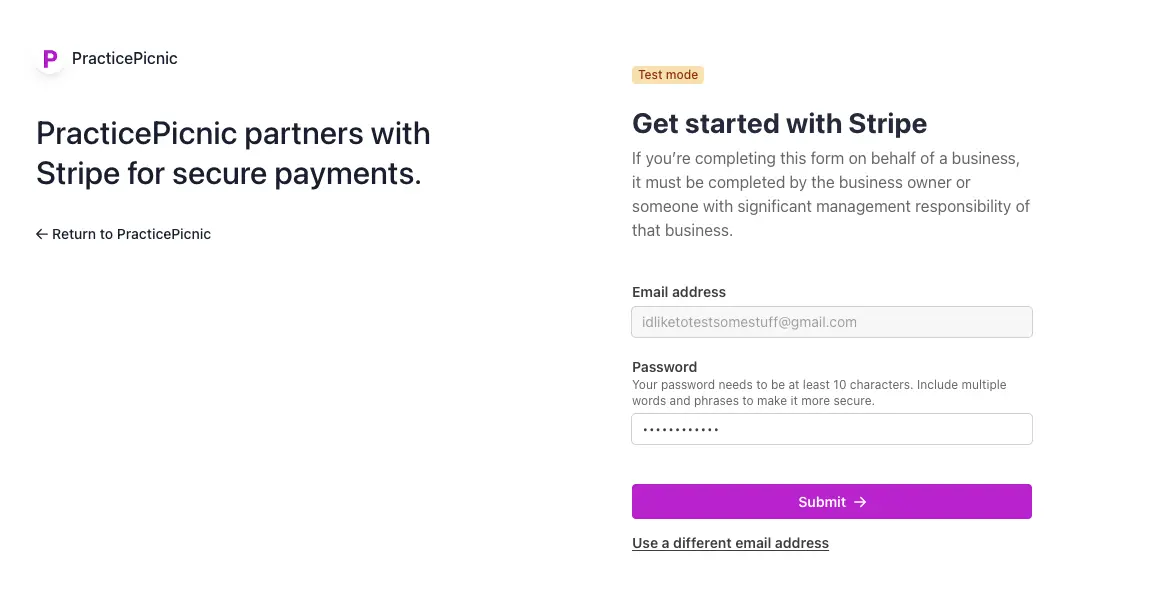
We're going to assume that you don't have an existing Stripe account for this set up. In this case, you'll be asked to create a password for your new Stripe account. This password does not have to be the same as your Practicepicnic password.
Enter a password for your account and click "Submit".
You'll have to enable two factor authentication for your account before continuing. The easiest way to do this will be using your phone number.
If you know what you're doing here, feel free to use an alternative method. But for most people, using your phone number is the easiest way to set this up.
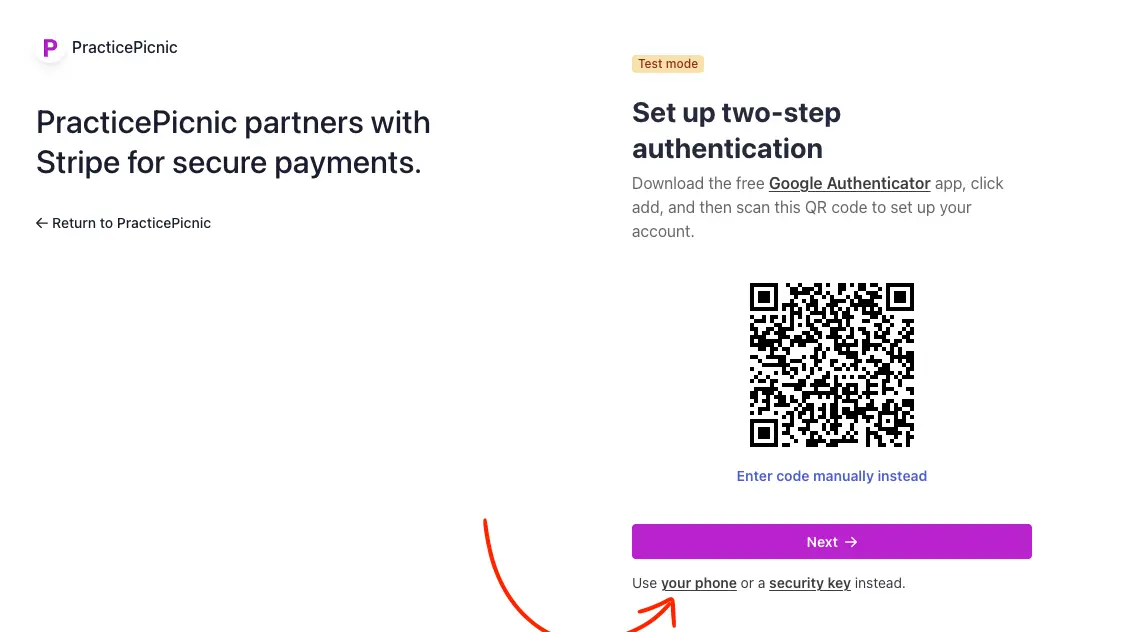
In the following screen, you'll have to enter your phone number. You'll receive a text with a code. Enter that code back into the text box they provide.

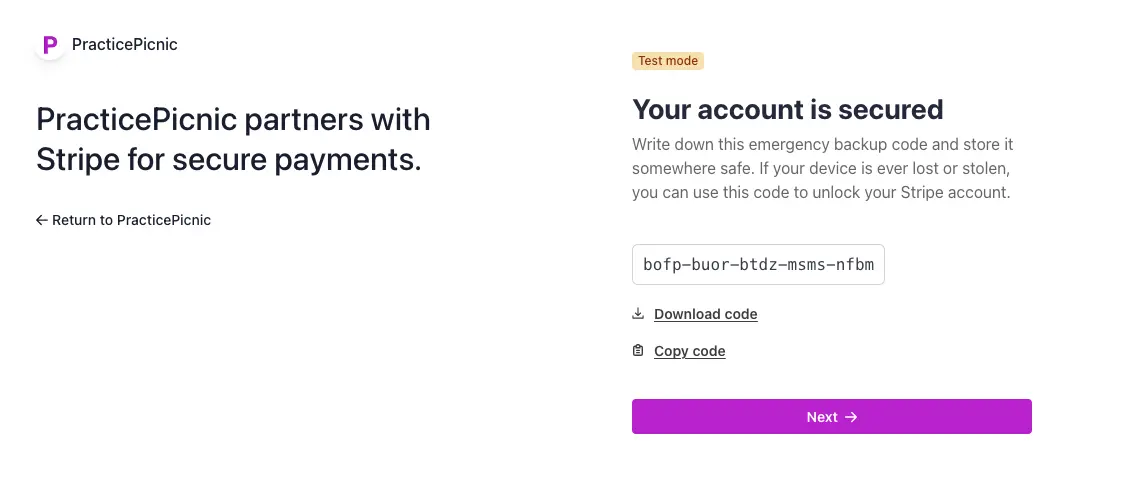
Once you've verified your phone number, you'll be asked to save your emergency backup code. This code can be used to regain access to your Stripe account if you ever forget your password or lose your phone. We recommend saving this code in a secure location.
Click "Next" when you've saved the code.
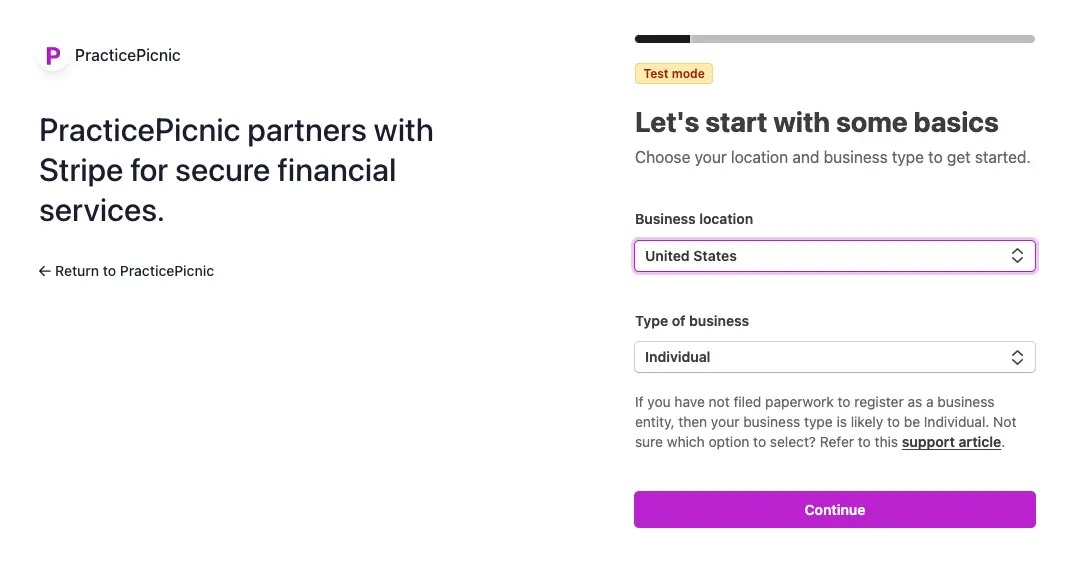
Next, you'll provide some information about your business. First, enter your business location and business type.
The location will be United States. If you have not filed paperwork to register as a business entity, then your business type is likely to be Individual. If you have, select Company from the dropdown and enter the relevant details.
Click "Continue" once you're ready.
On the next page, depending on what business type you selected, you'll be asked to provide additional details necessary for regulatory purposes. Fill those details out and click "Continue" when you're done. The exact details you'll have to provide will depend on your business type, but eventually, you'll arrive at the business details page.
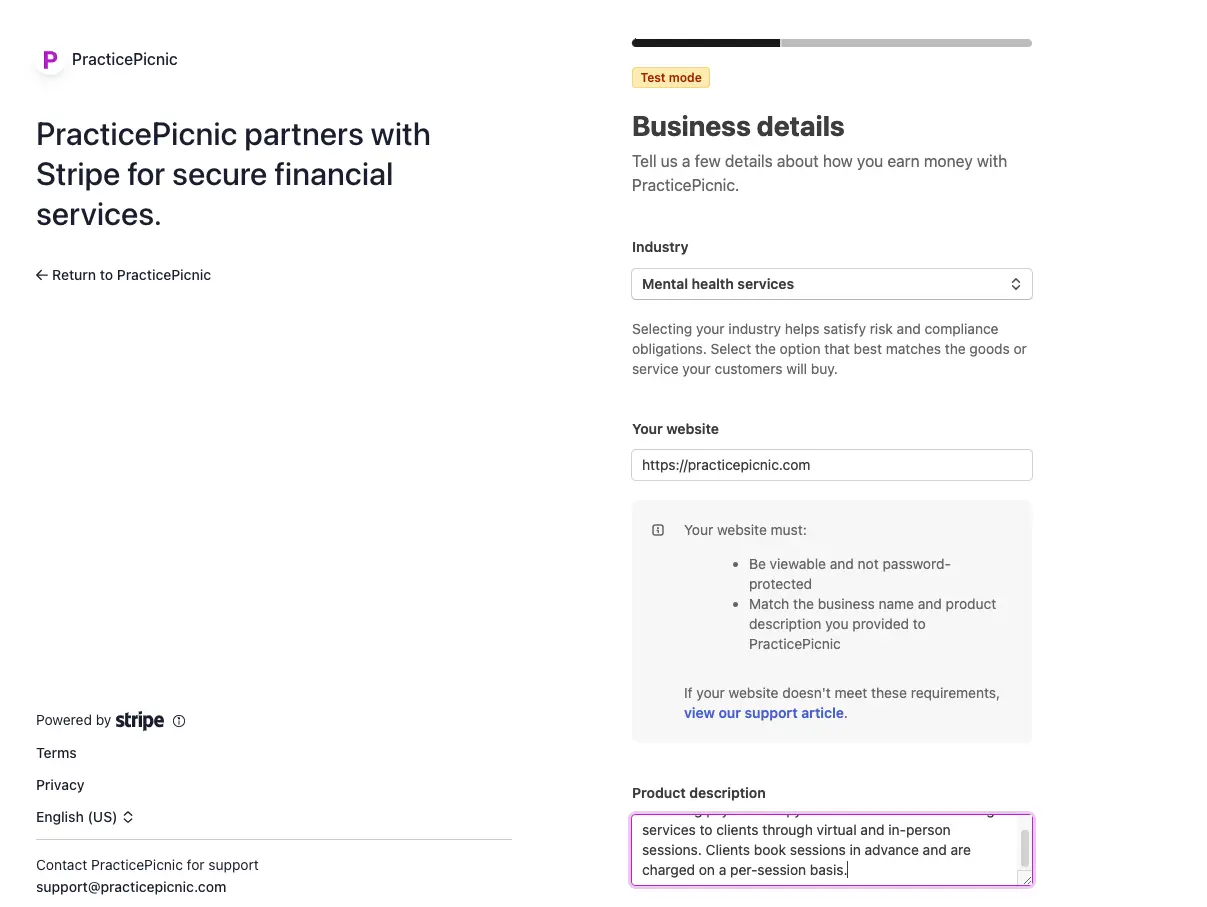
On the business details page, you'll be asked to fill out a few fields.
- Industry: This will likely be "Mental health services" in your case.
- Your website: If you have a website, you can enter it here. If not, you can provide the link to your Practicepicnic booking page.
- Product description: Here is a starting point for this field: "Providing psychotherapy and mental health counseling services to clients through virtual and in-person sessions. Clients book sessions in advance and are charged on a per-session basis." Customize as you see fit.
Once you'll filled in the fields, click "Continue" at the bottom.
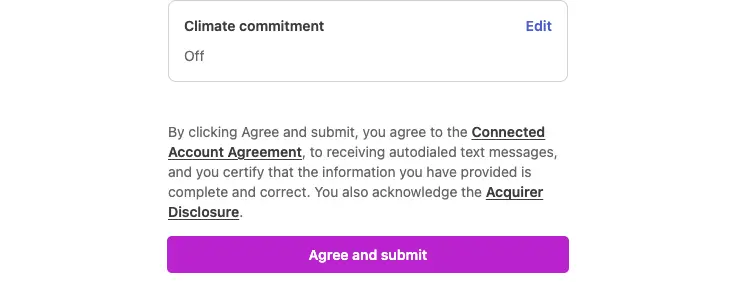
Next you'll configure your payout and customer statement details. On each page, fill out the details requested and click "Continue" at the bottom until you arrive at the final review page. Once here, make sure everythiing looks good and then click the "Agree and submit" button.
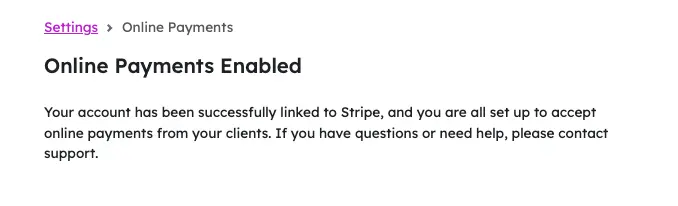
Once everything is complete, you'll be redirected back to Practicepicnic. You should see a message saying "Online Payments Enabled". This means you've successfully set up your Stripe account and are ready to start accepting payments from your clients.